Ahh, spring cleaning. Whether you’re a “snowbird,” just now putting your boat away for hurricane season, or a summer boater getting the boat ready for the season, spring is a great time for a thorough galley cleaning.
I prefer to tackle the job one locker at a time. Some, instead, do one step at a time and ending up with everything out of every locker at once. Your preference may be to open all the lockers, make one big mess and then have it done with. There’s no one right way!
Food and Lockers
I start by taking each item out of the locker and checking to see if it’s still good. Then I pitch anything that insects have gotten into. I also toss moldy items, powders that are rock hard, or anything that otherwise looks “bad” (read more about checking spices).
My next rule is that if I’ve had it over a year and we haven’t eaten it, set it aside to donate to a food pantry.
Then I wipe all the “good” cans and bottles down with a bit of bleach water and let them dry. While they are drying, I remove any non-skid shelf paper and bins in the locker and wash them out, too. I like to give them a wipe down with bleach water, too, before letting them dry. And finally, I wash out the locker itself. But first I clean any old bay leaves or other “critter control” out (discard all these).
I let the locker dry. Then I put fresh bay leaves (to protect against weevils in items with flour, corn or other cereals), cloves (ants) and roach preventive in the bottom. Then any bins and non-skid go back in (make sure they’re 100% dry).
As far as the food goes, that depends. Are you getting the boat ready for the coming season or putting it away?
If you’ll be using the boat, I recommend inventorying the food as you’re putting it back in the lockers with my Downloadable Inventory & Provisioning Spreadsheet. I usually end up rearranging things a bit, too, as I re-think what items I want easiest to get to.
If you’re in the process of “de-commissioning” the boat (assuming it will be left for months, not just a week or two), take most food off the boat. If it won’t freeze, you can leave canned food on board. But the quality will degrade if it gets particularly hot on the boat for weeks on end. It won’t hurt you to eat the food, but I often notice that the color has darkened. I tend to take everything else off the boat to avoid any possible bug and mouse infestations. If it will be hot, be sure to take spices off as they’ll be totally dead otherwise. Ditto for baking powder and any box mixes that contain baking powder (almost all do).
On the other hand, if you’re getting the boat ready for the season, there probably isn’t much food already on board. Hopefully you gave the galley a thorough cleaning before you left it at the end of last season. If so, just give it a wipe down with bleach water. Then change all the “critter proofing” (the bay leaves, cloves and roach killer). But check carefully as you go through each locker. If here is any sign of mold, mildew, bugs or mice, take care of it before you bring any other food (or other gear) aboard. Problems only get worse if they are ignored!
Fabrics
I don’t like to leave “dirty” fabric items on the boat as they tend to attract bugs. It’s best to wash all the towels, dish rags, place mats, rugs and whatever else can safely be washed. (Don’t forget bedding, even though it’s not part of the galley). Then put them in plastic bags to keep dust off. Some people like to take them off the boat in the off season. If it is likely to even very hot and humid on the boat when it’s closed up, taking anything rubber-backed off to a cooler location will help prolong the life and keep the items from sticking to whatever they are on. Rubber-backed rugs have a tendency to stick to the floor if left in place. When you lift rugs next season you’ll frequently have part of the backing pull off.
TIP: I’ve heard from a couple of cruisers that putting dryer sheets in with fabrics when you are storing them is a bad idea as they mold easily.
At the beginning of the season, quickly check everything. Make sure it’s still clean and bug-free.
Utensils, Cookware, Dishes
As part of my spring cleaning, I pull out all my pots, pans, dishes, utensils and everything else. I take a good look at them while at the dock with plenty of water. Many times, I’ll find some “gunk” under the lip of a pan, or utensils that haven’t been used for a while. I assume they have just picked up some stickiness from the humid air and dust. I heat up a big pan of wash water and give everything a good scrubbing. And I also wipe out the drawer or locker, replacing any liners necessary and so on. Make sure that everything — both the locker and the contents — are totally dry before putting things back in their places.
This is also a good time to see if anything needs replacing. Or make sure you have no gear on board that you never use and is just taking up space.
Stove/Oven
Yuck. This is one of those nasty jobs, but important. Grease and food particles around the stove both attract bugs and rodents. And can be a fire hazard and the source of some funky odors, too. If you’re a part-year boater, it’s best to do this at the end of the season to lessen the chance of a bug infestation over the off season. But if you didn’t do it at the end of the season, do it now!
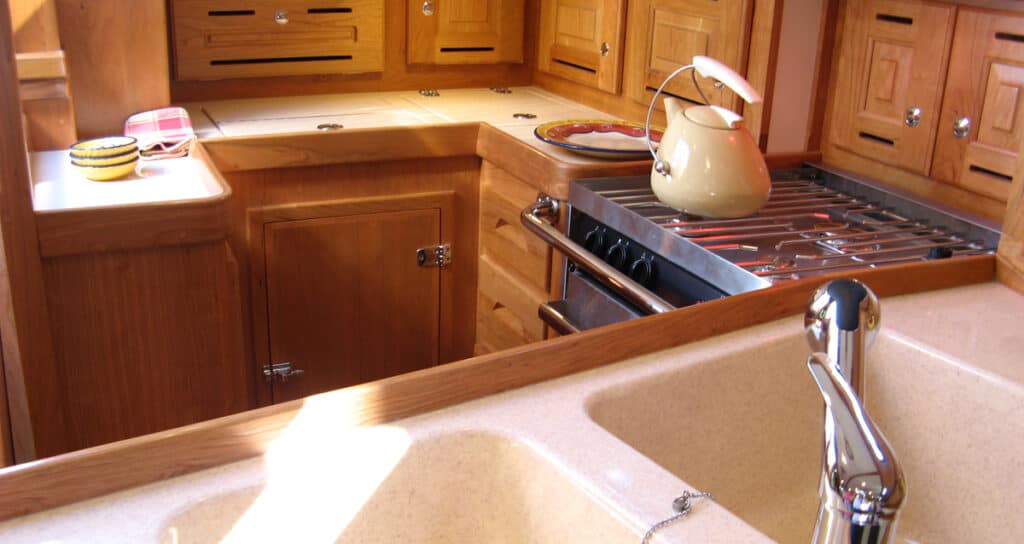
In the typical boat installation, there are four parts to cleaning the stove and oven. (Omit the “oven” portion if you don’t have one). Check your owner’s manual for specifics. Basically, clean the oven and racks, the top and all the burners, under the stove and all around it (both the stove and the “walls” around it). Most stoves can be removed for cleaning around them. Check the owners manual for instructions. Or at least you can read how it was installed and reverse the steps to pull it out. If your owners’ manual does not have directions, check the manufacturer’s web site. If that also fails, there’s always Google.
I don’t have any wonderful labor-saving ways to make cleaning the stove and oven easier. However, spraying everything down with your cleaner of choice and letting it sit for a few hours (or overnight) may help. A good degreaser (my favorites are Awesome (Amazon) and Krud Kutter (Amazon), and any with orange tend to be pretty good) and hot water helps in cleaning the surround.
If you have a microwave, give it a good cleaning, too. Be sure to remove it to get under it and behind it.
Refrigerator/Ice Box
If you’re ending your season, it’s also time to defrost the refrigerator and clean it out. See my post on how to defrost the refrigerator for details. Obviously don’t put any food back in it and eave it turned off. It’s a good idea to wipe it out with a baking soda and water solution (maybe a 1/2 cup of baking soda in a quart of water, I never really measure it). This is also a good idea for ice boxes and coolers. Be sure to dry it out as thoroughly as possible!
Leave the box propped open for the off-season so that air can circulate to at least some extent. Closing the box up will almost guarantee some funky smells in there when you open it again. Mold is likely to grow, too. I usually leave an open container of baking soda in the box. Some cruisers wipe the insides down with a tea tree oil solution to retard mold and mildew too.
If you’re beginning your season, I like to wipe down the inside of the box with a baking soda solution before putting any food in it. If you find mold has invaded in the off-season, wipe it down with a vinegar or tea tree oil solution). Dry it thoroughly, too.
And don’t forget, vacuum the refrigerator coils and any air vents and fans leading to them. Do this monthly. Read more about keeping your refrigerator running efficiently here.
Counters, Floors & More
I like to leave everything clean at the end of the season. Then I wipe it all down again at the beginning of the next season. I dig into all the nooks and crannies of the fiddles, storage cubbies and everything else. Depending on what I’m cleaning, I use degreaser, ammonia, bleach water, vinegar water, baking soda and maybe even cleanser. I have just recently started learning about tea tree oil. I’ll use it in the future to retard mold and mildew.
To get into little areas, I use both Q-Tips and a screwdriver with a bit of rag or paper towel over the tip. I loved the fiddles on Que Tal’s galley counters underway. They made it almost impossible for anything to fall off. But the joint between the counter and fiddle just collected crud. And while I cleaned it daily, several times a year I’d really dig into the corners. Surprisingly, there was more gunk than I realized lurking there.
If your lockers have louvered doors, it’s important to clean the louvers. Dust and grease just love to get in there and stay. The easiest way to clean them is to remove the doors. Mine just lifted off the hinges so it was easy. Then I’d take them out on the dock and use a hose. A quick blast of water, a dab of biodegradable soap if I really needed it, and then I’d let them dry before reinstalling them.
The doors that weren’t easily removed were more, uh, challenging. I used Q-Tips in the corners of each slot. The I slid a rag soaked in cleaner through each slot so that I could take an end in each hand and “scrub” back and forth. In salt-laden air, the slots get really sticky!
It’s also a good idea to clean any fans in the galley area. And if there is a nearby exhaust fan, get that too. The humidity and grease produced by cooking gets on the blades and attracts dust which then turns into “gunk.” I like the Caframo fans as the blades are finger-safe and not enclosed in a cage. That makes them (relatively) easy to clean. We got our Caframo fans from Amazon. Other fan designs may have to be partially dissembled in order to clean the blades. But when you take a look at what’s on the blades, you’ll probably be motivated to take the time to do it!
Spring Cleaning Necessity
I admit, doing a thorough spring cleaning of your galley is a pain. Even though it’s a smaller space than a shore kitchen, it seems harder to clean. There is just so little space to work in. However, really doing the job right is essential for avoiding bugs, rodents and funky smells.
Related Posts
Flatten the learning curve with practical how-to info that gives you the confidence to step into life aboard.
Start Learning Today

Carolyn Shearlock has lived aboard full-time for 17 years, splitting her time between a Tayana 37 monohull and a Gemini 105 catamaran. She’s cruised over 14,000 miles, from Pacific Mexico and Central America to Florida and the Bahamas, gaining firsthand experience with the joys and challenges of life on the water.
Through The Boat Galley, Carolyn has helped thousands of people explore, prepare for, and enjoy life afloat. She shares her expertise as an instructor at Cruisers University, in leading boating publications, and through her bestselling book, The Boat Galley Cookbook. She is passionate about helping others embark on their liveaboard journey—making life on the water simpler, safer, and more enjoyable.


Carolyn Shearlock says
I’ll have to take a look at it. Thanks for letting me know!
The Boat Galley says
I always mixed boric acid with powdered coffee creamer. Just use enough boric acid to make a thick paste (about like the thick paste glue kids use, or peanut butter). And if you don’t have shells, beer bottle tops or soda tops work well. I also would take a stick (that I would throw away after I was done — don’t use anything good) and smear some under the top lip of lockers, etc.
Alice McKenzie says
Many thanks!! Off to get some powered coffee creamer!!
The Boat Galley says
Glad you find it useful!
The Boat Galley says
As a girl who grew up in Lansing, I like your profile pic! (Great-grandfather, grandparents, parents, brother and a whole slew of other relatives all went to State)
Carolyn Shearlock says
Definitely be careful with fabrics. I use 1:10 standard bleach to water.