One key to keeping your boat refrigerator running efficiently is to defrost whenever there is 1/4 inch of frost built up. In the Sea of Cortez (surrounded by desert), I had to defrost about once a month. Now, in extremely humid southern Florida, it’s about once every 10 days.
Defrost your Fridge the Easy Way
This doesn’t have to be a huge chore. With a hairdryer and inverter (or shore power), I could defrost the large refrigerator on our previous boat in about 35 minutes. (Be sure to read my notes at the bottom of this article if you don’t already have a hairdryer on board.)
It takes a little longer — about 45 minutes — on our current boat as the refrigerator manufacturer recommends not using a dryer. Apparently it could warp plastic parts inside the refrigerator. So even though the total time is longer, I’m not actually working on it the whole time.
In this age of frost-free refrigerators, many of us have never manually defrosted a refrigerator. Or we have only dim memories of mom doing it when we were a kid. It took me a while to learn how to quickly defrost the refrigerator, so I didn’t dread having to do it. It helps if all your food is already in bins. If you’re in a hot climate, you have to work fast so that food won’t spoil.
My Defrosting Method
Here’s how I defrost my fridge, step-by-step. It starts with emptying the fridge.
Empty the Fridge
- Put your most perishable foods (frozen foods, milk) in the best coolers you have. I like soft-sided coolers on the boat because they’re easy to store. The Polar Bear 24-can and 48-can coolers (from Amazon) aren’t cheap. But they really work well both for defrosting and getting stuff back to the boat from a distant store. If the items are already frozen, they’ll stay that way for a couple of hours even without extra ice if you’ve got a good cooler.
- Take all your bins out of the refrigerator. Quickly check to see if any need cleaning out, either from spills or spoiled food. Don’t wait. Take care of it now. Cover the bins with quilts, towels, pillows, sweatshirts or whatever else you have to insulate the contents.
- Turn off the refrigerator and remove all dividers. If there is a drain in the bottom, open it (see my article on why the drain should be closed for everyday operation).
Melt the Ice
- If you can, use a hairdryer to melt the ice build-up. Be careful not to actually get the hairdryer in any water, due to the electrocution risk. Many times, the hairdryer will cut off before all the ice is melted – this is a safety feature to keep it from getting too hot. Turn it off for a few minutes and let it cool off, then use it again.
- If you’re not using a hairdryer, my next choice to put a reusable hot pack in the freezer section. As it cools down, I replace it with another. Four about perfectly do it. (Read more about these or buy on Amazon). I close the door/lid to keep that heat in.
- If the freezer compartment is metal, you can alternately put a pan of boiling water in it to speed up the defrosting.
- If you have nothing else, point a fan at the inside of the fridge.
- After about five minutes, see if ice starts breaking off.
- Break off chunks of ice from the chill plate as possible — I do it every time I change the heat pack — and dump them in the sink. It is much easier to dry out the refrigerator if you don’t let them melt in the bottom of the refrigerator, and it also keeps them from continuing to chill the refrigerator.
- Be very careful around the chill plate or freezer compartment not to puncture a tube, but use a dull knife or piece of dowel to gently poke ice out of hard-to-reach places. Never use force, as you’re likely to break something and then you’ll be without a refrigerator.
- When all else fails, you can pour hot water over a stubborn bit of ice – but this will create a lot more work to mop it all out of the bottom of the refrigerator if you don’t have a drain.
Finish the Job
- Totally dry out the refrigerator, close the drain and replace any dividers before putting food back in the refrigerator. Any moisture left in the refrigerator will quickly turn to frost and ice, necessitating another defrosting job.
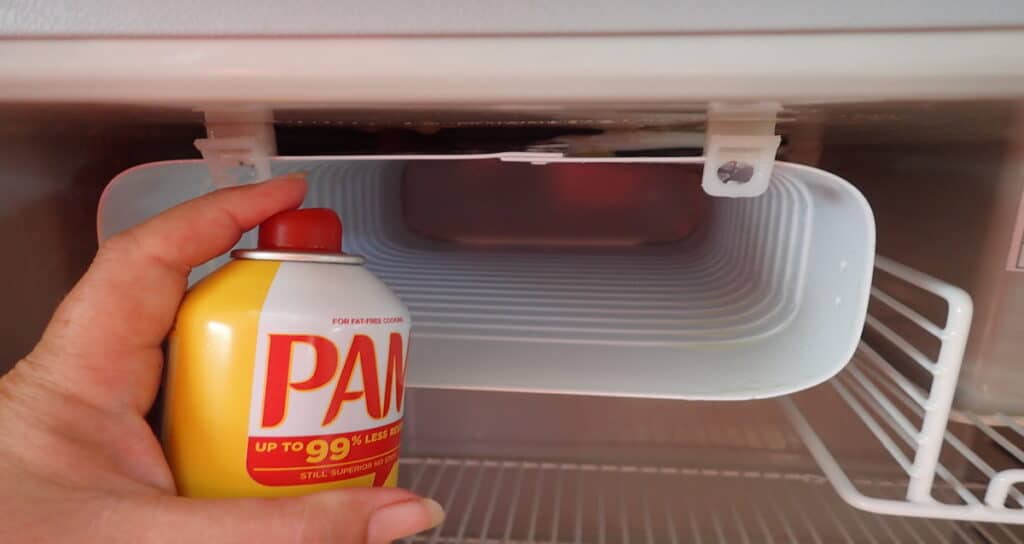
- ONE EXTRA STEP WILL SAVE A LOT OF WORK NEXT TIME: Spray the cool plate with cooking spray (like Pam) before you put everything back in. When you next defrost, the ice will come off much more easily and in big chunks! This has made it much easier for me. And it ensures that frozen food doesn’t stick to the compartment walls, either.
- Don’t forget to turn the refrigerator back on!
Using a Hair Dryer to Defrost
A FEW NOTES ABOUT USING A HAIRDRYER ON BOARD: If you don’t already use a hairdryer on board — and most cruisers have hair styles that don’t require one — there are a couple of things to consider:
- Most blow dryers are 1875 watts, although most mini-dryers are 1600 watts. Both are going to require a 2000-watt inverter and won’t work on the little inverters that plug into a cigarette lighter. You can also run one off shore power or a generator that puts out at least 2000 watts.
- I actually prefer using the mini dryers as the shorter nozzle is easier to use in the confines of a refrigerator and it’s easier to store. You don’t need one with a lot of features — I bought the cheapest one I could find.
- Try to find a dryer with a long enough cord that you don’t have to use an extension cord — or make sure that you’ve got an extension cord on board.
- What’s the power draw to use a hair dryer on an inverter? If you use an 1600 watt dryer on high for a total of 6 minutes (and if you keep the refrigerator defrosted regularly, I doubt if you’ll need to use it that long), you’ll use a little under 14 amp-hours from a 12-volt battery bank. If you don’t have a lot of solar or wind-generation power, this can be a good project on a day when you’re going to be motoring a bit so that you’ll have plenty of power to replenish the batteries.
- And, of course, you can now find 12 volt hair dryers (Amazon) as well. But they don’t appear to be highly rated.
Alternative Method
Another cruiser suggested another easy hack. She used a microwave (although you can just boil water on the stove too).
After emptying the freezer and the shelf immediately below the freezer compartment, spread a large trash bag over it and as far back and “up the wall” as possible. This will catch much of the drippings and ice chunk. Then I “nuke” (or heat) about 2 cups of water close to boiling. Pour it into a small metal pan and put that into the freezer. If you rotate 2 cups in the microwave, you can swap out the cooler water and reheat it.
Gently pry the ice off with your fingers or carefully with a chopstick or other dull implement until the job is done. A sponge under the freezer compartment will soak up the melting water. But the plastic bag catches much of it too. Carefully take the bag out and “dump” it into the cockpit.
Some thrifty cruisers harvest the leftover water to refill lead acid batteries.
Other cruisers have even had success turning off the freezer before bed and leaving the door closed. In the morning, just remove the fallen ice.
A spare turkey baster is another great tool to remove the last bits of water. Even better, if you have a access to a pump, you can pour warm water over the cold plates and pump it out.
Defrost Your Boat Fridge – It Isn’t Hard
I hope I convinced you this important task isn’t difficult. And doing it will make your fridge more efficient–always a worthy goal for any cruising boat.
What’s your favorite method? Share in the comments.

Carolyn Shearlock has lived aboard full-time for 17 years, splitting her time between a Tayana 37 monohull and a Gemini 105 catamaran. She’s cruised over 14,000 miles, from Pacific Mexico and Central America to Florida and the Bahamas, gaining firsthand experience with the joys and challenges of life on the water.
Through The Boat Galley, Carolyn has helped thousands of people explore, prepare for, and enjoy life afloat. She shares her expertise as an instructor at Cruisers University, in leading boating publications, and through her bestselling book, The Boat Galley Cookbook. She is passionate about helping others embark on their liveaboard journey—making life on the water simpler, safer, and more enjoyable.
Carolyn Shearlock says
Great way to do it if you’ve got a way to pump it out!
Thanks for adding! -Carolyn
Cyndy says
what if you used the “shake and pump” hose thing that you described in another article? I got 2, one for fuel and one for water, based on your recommendation. I’m needing to defrost (have been putting it off for over a week), now I feel ready to take on the task but I still think I’m just going to turn it off and let it sit for a little while first.
Also, I have really thick (insulating) bath mats that I keep over the top of both top loading doors anyway so I put them on top of the food and then cover the whole thing with towels in the sink. I’ve never had anything thaw that way. The bath mats do double duty as dish drainers while I do dishes.
Thanks!
The Boat Galley says
Thanks for the info!
Tony says
Love it! You could also use the baster to squirt hot water on the ice in hard to reach places. I am beginning to think that most boats need two basters, one for the kitchen, and one for the toolbox!
Carolyn Shearlock says
Absolutely!
The Boat Galley says
It makes a huge difference!
Carolyn Shearlock says
Great idea!
Sheryl Shard says
I often use a bowl of hot water to steam defrost the small freezer compartment in our Frigoboat front-opening fridge on Distant Shores II like Iain does. Another trick I use is to put in a few cans of unchilled beer or sodas into the freezer compartment which quickly melt the ice and cools the drinks 🙂
The Boat Galley says
Don’t you have a butter knife? I thought you were a sophisticated type of guy like that . . .
Sheryl Shard says
Sunday is my day to defrost the fridge and freezer on our boat too.
JAY says
Maybe a bit off-topic…I recently had to replace gasket on refrigerator. To make gasket more flexible soak in HOT water before you install.
The Boat Galley says
There’s a great hose puller tool, too: https://theboatgalley.com/exceedingly-helpful-tool-our-hose-puller/
The Boat Galley says
If you’ve got a drain or a way to pump the water out, that can work well.
Anonymous says
I used to use bowls of hot water in the freezer but care needed on a rolling boat, i now use a hot water bottle (the type you might use to warm a bed if you were in a cold climate!) This melts the ice in my little freezer compartment quite quickly and as Carolyn says remove the big chunks with something that won’t damage the freezer plate and tubes. I use a wooden spatula.
Chris Kellar says
A plastic or wooden spatula to unlodge the big chunks of ice after thawing begins works great.
Chris Kellar says
Doesn’t it make it greasy?
Carolyn Shearlock says
Not really. I was surprised. I’m hooked on the technique now!
Julie Olson says
We use our heat gun to speed defrosting.
Carolyn Shearlock says
Just be careful around any plastic. My new fridge has quite a bit of plastic on the inside and the company says not to use hair dryers or heat guns because they can warp the plastic.
GENA B Olson says
Thanks! Timely article. I have to defrost today, after being gone for 3 weeks. I had wondered about others’ experience on how often.
BTW, I found out the hard way that the ice forms on all sides of the freezer box, not just the inside top that is visible!
Gena Olson, mv Kittiwake. 1991 Bayliner 4588
Carey Mitchell says
We had a conversation with our local Frigoboat dealer today, and they recommended the following:
1. Never defrost an evaporator using a hard or sharp object like an ice pick, knife, or screwdriver.
2. Never defrost using an appliance that generates high heat, like a heat gun or hairdryer.
3. Natural defrosting is safest, but mild heat may be used if absolutely necessary.
4. After defrosting, make sure that all drains have a plug to keep warm air from re-entering the space