
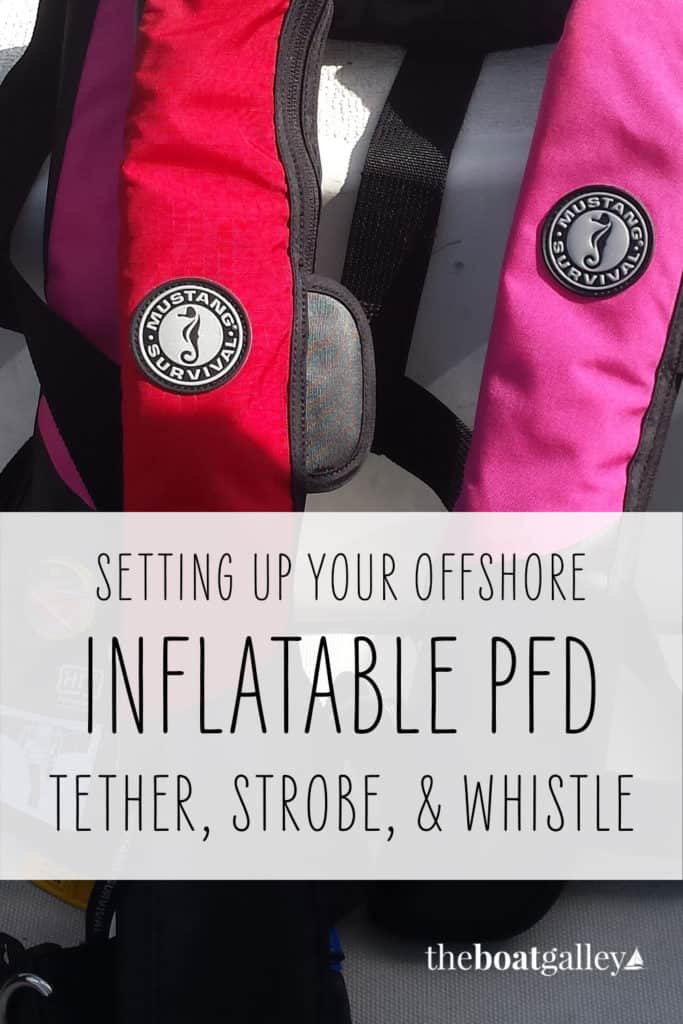
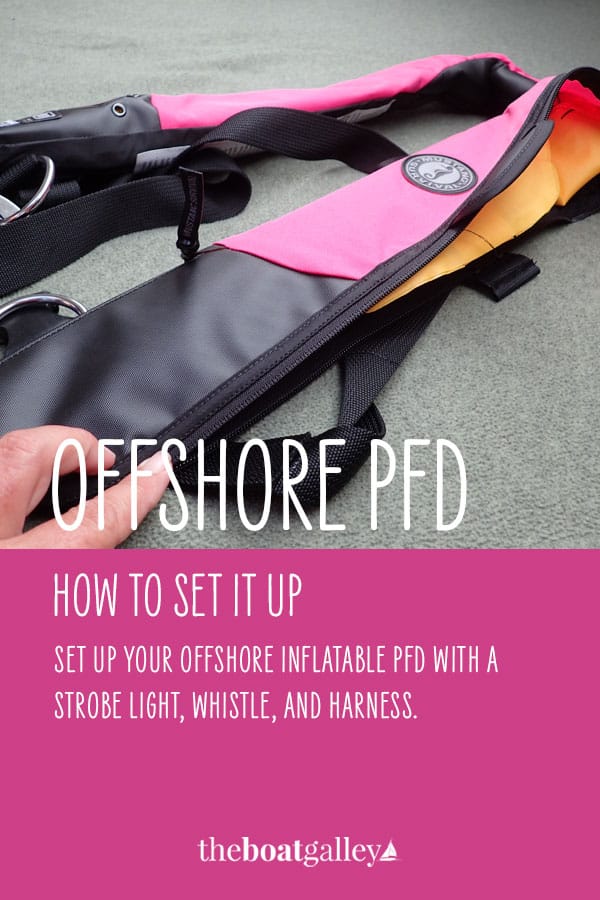
Getting a new PFD (personal floatation device): how to buy and set yours up.
Shortly after we bought Barefoot Gal, our Gemini 105M, Dave and I came to the conclusion that we really didn’t like the inflatable PFD’s (life jackets) that came with the boat. Above all, they were uncomfortable to wear, plus they didn’t have an integrated harness (there also weren’t any tethers or jack lines on the boat). Paz was better secured with her harness and leash attached to a cleat!
Getting a new PFD for each of us became a priority. Good PFD’s, harnesses and tethers are not inexpensive.
Two things to note: inflatable PFD are not suitable (or legal) for kids, and they satisfy the Coast Guard requirements of “one per person” only when worn. So if you are boarded and your inflatable PFD is in the locker (and you don’t have another non-inflatable), you’re in violation.
Choosing a PFD
We decided that we wanted:
- Hydrostatic inflatable. Hydrostatic units will not inflate in the rain, humidity or wave spray — it takes being at least four inches under water to trigger one. We’d had a problem with one PFD that inflated inside a locker while on our previous boat during Hurricane Marty. Friends had similar experiences wearing theirs in the rain. We thought it worthwhile to pay the extra for hydrostatic.
- Comfortable. We believe in wearing PFDs anytime we’re on deck in anything but the calmest conditions. But you can only do that if they’re comfortable. We scrutinized Practical Sailor reports and blogs to find out which ones people liked over the long haul.
- Integrated harness. We like just having one thing to keep track of and put on.
- Double tether so that in snotty conditions, we could clip on the new location before unclipping the old. Also having a choice of lengths (most doubles are 3′ and 6′) is nice. We can use the 3′ when working near any edge of the boat and still have the 6′ when the nearest attachment point is too far for the 3-footer.
- Strobe and whistle that are permanently attached. We prefer a strobe that automatically begins flashing and then can be turned off if desired — that way, should someone go overboard at night, they don’t even have to think about how to turn it on. Panic can make you forget even simple things.
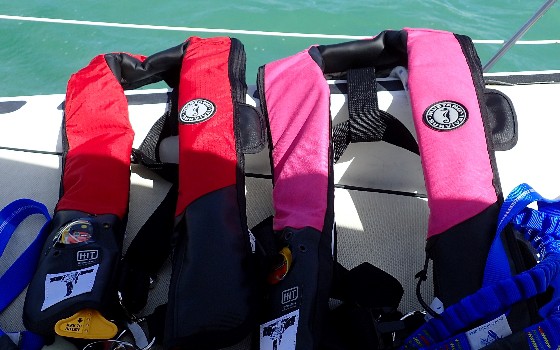
After a lot of looking around, we decided on one of Landfall Navigation’s “PFD Kits” — specifically the Premium Offshore package combining the Mustang Hydrostatic PFD, double tether, strobe and whistle. I think this is a good package and it’s what we chose for ourselves. It may or may not be right for your needs — this is a topic to research carefully before buying. Since we bought ours, Amazon has begun selling many top-end PFDs although not the kits — you have to buy the PFD, tether, strobe and whistle separately.
We got two different colors so that once we got one adjusted for each of us, it was easy to grab the right one.
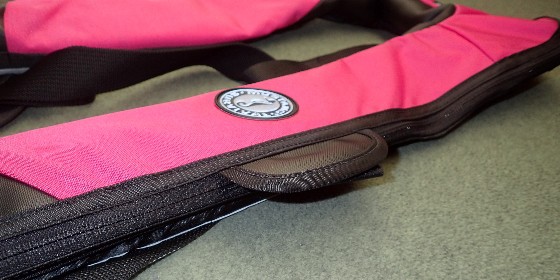
Setting up the PFD
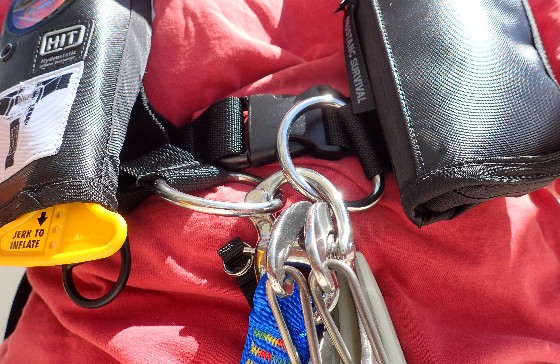
When they arrived, we had to attach the light, whistle and tether. The whistle is very simple — there are loops to attach it to using a split ring.
And the tether is pretty much like any other tether. The big thing to note with any tether is that the ONLY clip that should EVER be attached to the PFD itself is the one with the quick release. When not in use, the other clip ends should be clipped back onto the tether, never to the PFD. Reason? If you are clipped in and the boat were to roll and not right you want to be able to release the quick release (you can release it under tension) and go the surface. Similarly if there is a fire or explosion, you may need to get off the boat in a hurry. If one of the other clips is attached to the PFD you will NOT disconnect yourself from the boat just by pulling the quick release. If you find it hard to understand in words, clip yourself in somewhere and see what happens when you pull the quick release — can you walk away?
Start by testing the light (the instructions for this are correct). You don’t want to find out it’s defective just when you need it most!
Newer lights (such as the one I now recommend and which are part of Landfall’s current package) are water activated and simply need to be clipped onto the PFD.
Attaching an Older-Style Light
If you have an older-style light that is activated by a pin being pulled when the life jacket inflates, follow these steps to attach it:
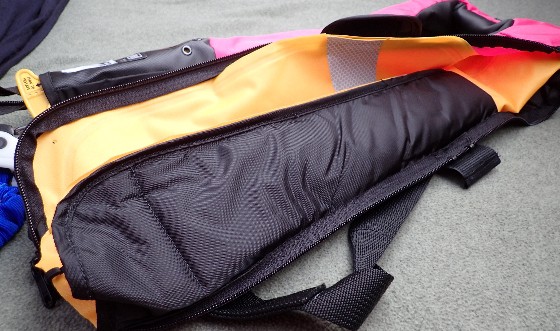
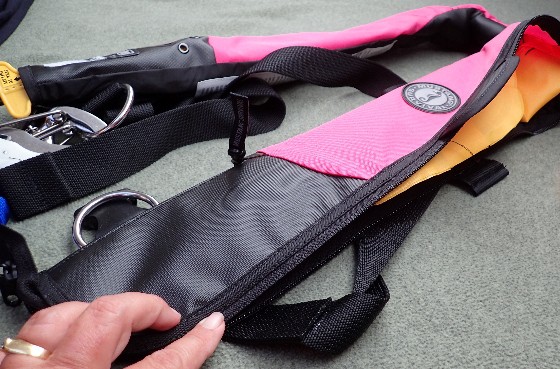
Begin by pulling out the zipper tabs on both left and right bottoms. You’re not going to do anything with them for a while, it’s just easier to pull them out now.
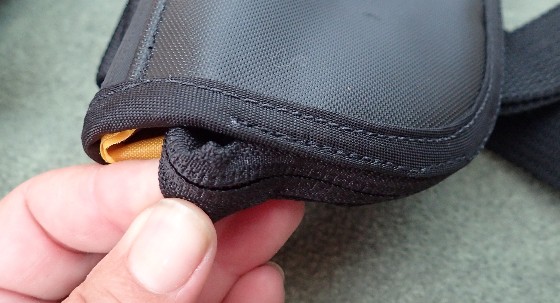
Undo the little Velcro flap on the left outside and pull the zipper apart. Don’t worry, it will go back together correctly. No, you DON’T use the tabs you undid above to unzip the zipper. Really, you don’t. I tried it.
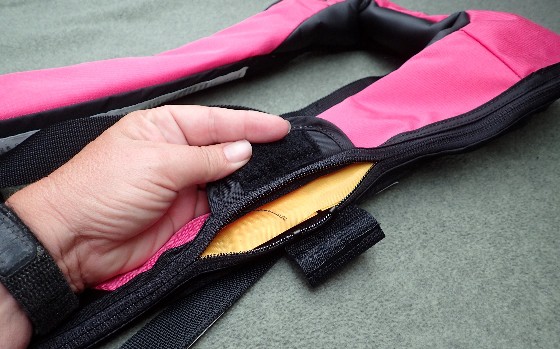
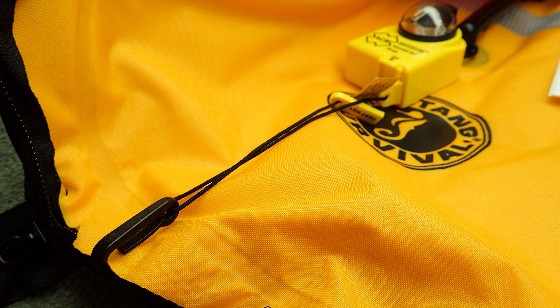
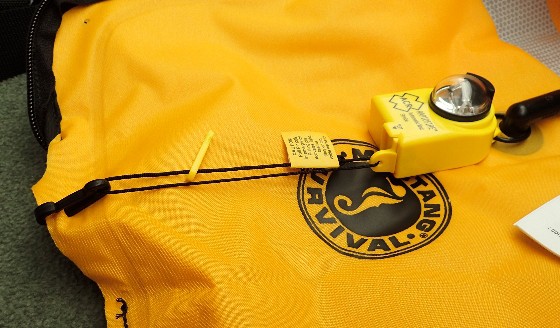
Inside, you’ll find the oral inflator tube (what you’d use to blow up the PFD by mouth if the CO2 cartridge didn’t fire). Drop the round loop on the strobe around the inflator tube.
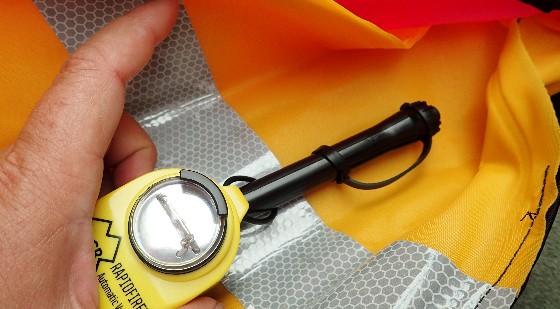
Now here’s where it gets interesting. On this model PFD, there is nothing to hook the clip from the light onto at the bottom of the inflation chamber. And if this clip isn’t hooked, it won’t pull the pin and start the light flashing automatically when the PFD inflates.
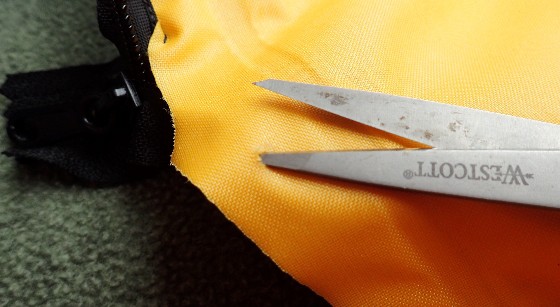
So you have to make a place to hook the clip. You have to very, very carefully cut a tiny slot OUTSIDE the inflation chamber in the yellow fabric. Be sure to do it OUTSIDE of where the welded seam is!
I began by clipping it without cutting, so I could see just where I needed to make the slot.
Then I took a deep breath and any made a small hole.
Clip the light in. The whole assembly should look like this. In an emergency, when the yellow inflation chamber fills with “air” (CO2), it will pull the pin out of the light and it will start flashing.
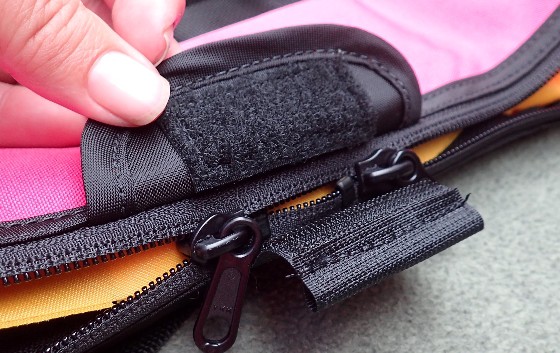
Fold the black outside flap in.
Then the colored flap goes over it.
From where you pulled those zipper ends out back in the beginning, slide the zipper pull all the way to the “end stops” that are under that Velcro tab.
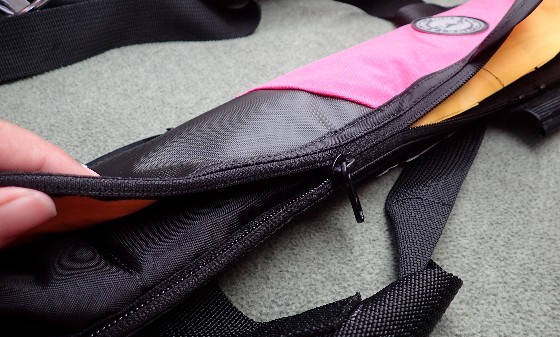
This will bring the zipper together at the small end of the pull tab and open the zipper from the fat end.
Now zip it up back to bottom on both sides and tuck the ends back in.
Final Steps
You’re almost done — take a permanent felt marker and put your names and the boat name on the PFDs — we did it behind the neck so you don’t see it in the photo, but it’s there.
Finally, adjust the straps so that it’s comfortably tight. In case of an emergency, you want it to stay on, but you have to be comfortable wearing it. As you put on or take off foul weather gear or other layers, you’ll almost certainly have to readjust it.
And above all else, wear it! Talk with others on your boat and set clear rules about when PFDs must be worn and when you’ll use tethers. It does no good to buy great gear and then leave it in a locker — it cannot save your life there. When we’re on the move every few days, our PFDs and ditch bag live on seat next to the companionway where they’re easy to grab.

Carolyn Shearlock has lived aboard full-time for 17 years, splitting her time between a Tayana 37 monohull and a Gemini 105 catamaran. She’s cruised over 14,000 miles, from Pacific Mexico and Central America to Florida and the Bahamas, gaining firsthand experience with the joys and challenges of life on the water.
Through The Boat Galley, Carolyn has helped thousands of people explore, prepare for, and enjoy life afloat. She shares her expertise as an instructor at Cruisers University, in leading boating publications, and through her bestselling book, The Boat Galley Cookbook. She is passionate about helping others embark on their liveaboard journey—making life on the water simpler, safer, and more enjoyable.
Mark & Cindy - s/v Cream Puff says
Dose this model have a pocket for a PLB?
Mark & Cindy
s/v Cream Puff
Carolyn Shearlock says
No, but there are a number of attachment points where it could be clipped. However, you might prefer to have it clipped somewhere on your clothes (belt loop maybe?) so that if you take the PFD off (say to put on/take off a jacket and just then the boat lurches . . . ), it’s still on you.
We don’t have PLBs and so it was not a factor in our choice. I went back and took a look at a number of inflatable PFDs and didn’t see a pocket for a PLB on any of the ones I looked at (can’t say that I looked at all available — I looked at probably a half dozen).
LISA BATCHELOR FRAILEY says
I have the same PFD (with strobe) and was able to attach an MOB1 AIS PLB. The bracket clips to the inflation tube, and the activating ribbon wraps around the folded bladder. I did have to make one small hole in the fabric to get the ribbon all the way around. Packs in nicely, and remains safely stowed – but deploys when the bladders are inflated.
Spencer Gellert says
I read an article that said most folks never actually inflate and try out an inflatable before they buy it and in fact the way it makes you lay in the water is quite uncomfortable. Your thoughts. Thanks
Carolyn Shearlock says
I’ve worn one from a waist pack in the water. It tends to hug your neck more than a non-inflating, but it also keeps your head way higher out of the water. In bigger waves, this is an advantage. But in calm conditions, the discomfort in the water might bother you.
Christine Springfield says
I bought the Onyx A33 models for me and the hubby because of the integrated pockets. I blew both of them up and put mine on and jumped in the pool. From that experience, I learned that getting into a blown up vest is going to be immensely difficult if overboard in anything but the calmest waters. (So inflate yours while already wearing it if you want to try it) It was VERY tight around the neck but once in the water, it was not uncomfortable. I also tested to see if it would roll me over if unconscious and face down and it succeeded. After making sure they stayed inflated for the recommended 16+ hours, I applied reflective tape to the inflation chambers at the highest point of flotation, armed the strobes and checked them, stuck the whistle/floatie/signal mirror in the pocket and made sure everything was tied to the vest. Am I OCD or what?
Carolyn Shearlock says
Actually, that’s all great to do. I mean, it IS your life!
Paul Schroder says
Nice choice! I’ve used these for 9 years now and have G’s the opportunity to “use” the expired cartridges for testing. Very nice!
Sherie Gibson says
Carolyn, what are your thoughts on crotch straps for the Mustang PFD?
Carolyn Shearlock says
I think crotch straps are a great idea in theory. Unfortunately they are really annoying to wear. We don’t have them simply because we think it’s more important to have the PFDs be comfortable enough that we WILL wear them (crotch straps do no good if the PFD is in a locker). If you don’t mind wearing them, get them!
Court Crosby says
I made crotch straps (one for each life jacket is enough) with quick release buckles. They live wrapped around the waist or over a shoulder until you are in or going to get in the water. Then you unclip it, slip it between your legs and clip it. In the water you cinch it up under one thigh.
Susan Lowe says
We just bought 4 new ones as well..yes, big expense but with my boys on board, one disabled..a true necessity and I don’t care about the cost.
Anita Moeder says
PFD technology has come a long way in keeping us safe. They’re even comfortable now! ❤️⛵️❤️
Susie says
Crotch straps are essential; put your life jacket on and get someone to stand higher than you and try to lift you. Without crotch/thigh straps you’ll simply slip through, if this was a real rescue you’d still be in the water, possibly unconscious, possibly at night. If crotch straps are cumbersome or uncomfortable try thigh straps similar to those on the Spinlock deck vests.
WANITA Meed says
I have a Spinlock with a hood. I thought the spray protection would keep me from panicking in the water.
It’s comfortable enough to wear it. I inflate it every year but never had to ‘use it’. The spray hood was all cloudy this year so I used Klear-to-sea with a soft cloth but with some rubbing it came up like new. Hope I don’t have to do it every year!
It came with leg straps and even watching the video I could not figure out how to attach them!