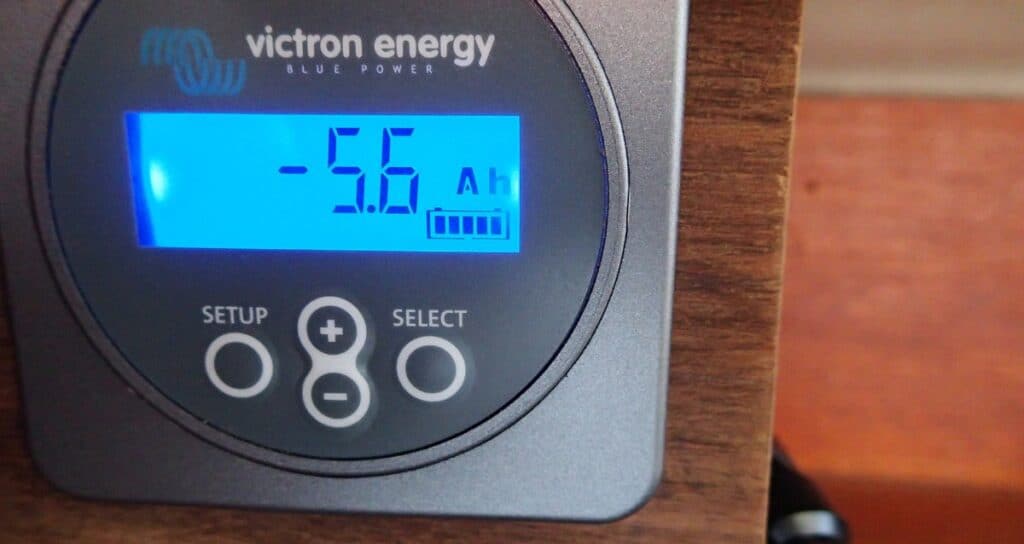
Why You Need a Battery Monitor on a Boat
How do you know if your batteries are getting charged enough? Is there enough power to watch a movie? Are your solar panels or wind generator sufficient? Do you need to run the generator?
These are all important questions on a cruising boat. And we couldn’t answer them because Barefoot Gal only had a voltmeter that displayed the battery voltage. Voltage isn’t a great way to determine state of charge in the first place, but for it to come close at all, the batteries have to be “at rest” for at least 15 minutes. We’re almost always either (or both) putting power into the batteries from the solar panels, or using at least a bit of power.
We needed a battery monitor. A battery monitor shows the net amps in and out of a battery bank and the net amp-hours used since the battery was last fully charged. Most also show things like voltage and percentage of full charge, maybe battery temperature as well. At least for Dave and me, the important numbers were the amps in and out and amp-hours down.
We never want to use more than half our battery capacity. Using more will significantly shorten the battery life. In fact, some experts argue that you should not use more than 20% or 25% before recharging. (This applied to our lead-acid batteries. Different battery types have different guidelines.)Thus, knowing both our total capacity in amp hours and knowing how many were “down” at any time let us know how we were doing against this standard.
The amps in/out were also important for knowing how we were doing at any time during the day. IIt also helped us determine which items aboard hogged energy. Plug something in (or turn it on) and see how the amp flow changes.
Choosing the Victron Battery Monitor
Battery monitors can monitor a single bank or a single bank plus show the voltage on a second bank (say a starting battery). And relays can be wired in to do things like start a generator if the state of charge gets to a specified point. Some, such as the Link 2000 that we had on our previous boat Que Tal, also control the shore charger and inverter. We didn’t need to do all that. Barefoot Gal had a single battery bank. We started the engine with the house bank since it was so small. Our generator was a portable Honda, and our shore charger and inverter stood alone.
Adding a single bank or two-bank monitor is something that most boaters can do for themselves. Things like wiring in relays for generators and charger/inverters take more advanced skills or hiring a professional. Since ours would be simple, we were going to do it ourselves.
A couple of notes about the Victron (the other monitors may have similar features): it will work with any type of batteries (wet cell, AGM, gel or even Li-ion), and the shunt is 500 amps, which is sufficient for most starters, windlasses and other large loads. I am not saying that the other brands are bad monitors, simply that Victron was our choice for a simple installation.
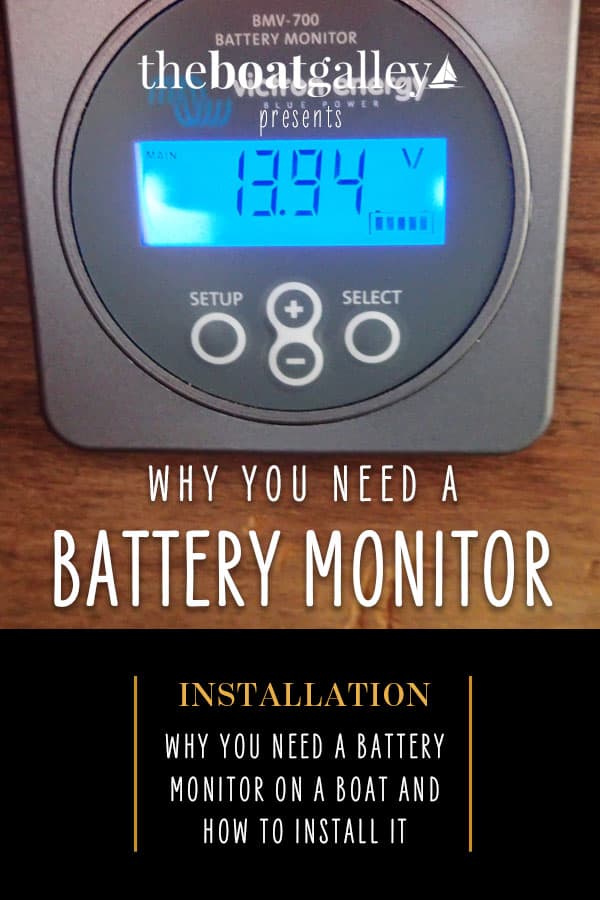
Since we only had one battery bank, we used the Victron 700 (Amazon). The model 702 is for two battery banks, also available on Amazon. The same quick installation guide and owners manual apply to both.
A Brief Word About Other Options
Several companies make battery monitors suitable for boats. Xantrex (formerly Link) is perhaps the best known, but Blue Seas also makes them, as does Victron. We went with the Victron as it cost the least, was the simplest to install, and got great reviews.
- The “base price” for the Victron monitors was similar to that of similar models from Xantrex, but the Victron ones come with pretty much everything needed for installation, whereas you have to buy a separate “installation kit” for the Xantrex ones. With either, you’ll still need to make up a cable or two and provide mounting hardware.
- The Victron had much easier wiring, almost plug and play, while the Xantrex was more complex.
Pre-Installation Wiring Work
Before we could add the monitor, however, we had to clean up the wiring done by previous owners. Barefoot Gal had some “idiosyncracies” such as one battery wired directly to the positive bus bar instead of the switch. This meant that the power was always on to everything on the bus bar. All of our electric devices worked, but we knew it wasn’t right. So we started by spending a couple of days tracing and then cleaning up the positive side of things.
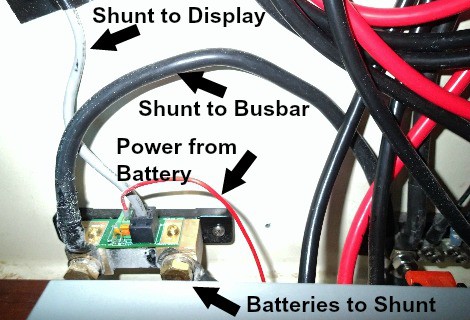
Then we turned to the negative side. Battery monitors work by means of a shunt installed between the negative post of the battery bank and the “load” (that is, all of the electrical devices). For one to correctly track amps in and out, nothing can be connected directly to the negative side of the battery bank other than the shunt. Anything that is connected directly to the battery won’t be tracked.
The best way to hook things up is to use a bus bar. The negative wire then goes from the battery to the shunt, the shunt to the bus bar, and then from the bus bar to all the devices. Barefoot Gal already had a bus bar, and most things were connected there. We only had to move one wire from the battery to the negative bus bar.
NOTE: All of this clean-up work is necessary no matter what brand of monitor you use. Most boats will have a few wires that have to be moved for the monitor to work properly.
Installing the Victron 700 Battery Monitor
We were finally ready to install the Victron battery monitor. It took us two half days to do the installation, but a good part of that was creating a place to mount the monitor. Neither one of us was a skilled carpenter, so projects such as this always took us longer than they should.
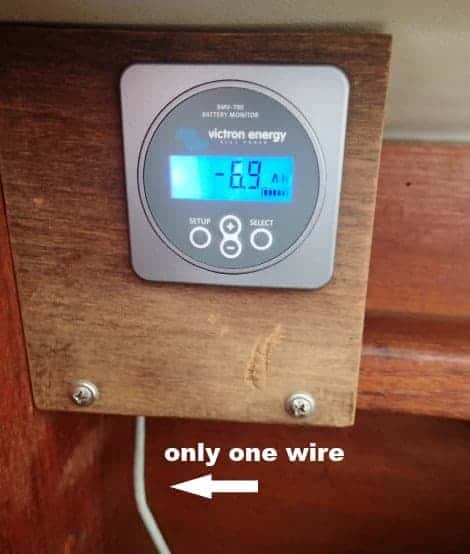
Where you mount the display is totally up to you, although you want it in a place that is convenient to check. The Victron comes with a 33-foot cable, so it can be placed at quite a distance from the batteries.
Install the Display
With the Victron battery monitor, the display is connected to the shunt by what looks like a phone cord. It even has the same type of snap-in plugs. This makes it really easy to run the wires and impossible to connect them incorrectly.
Install the Shunt
After installing the display unit and running the wire to it, the next step was to mount the shunt and run the wires to it. We took the large negative cable that used to go from the battery to the bus bar and moved it to run from the shunt to the bus bar.
The shunt has large posts on it — 3/8″ — so we had to put a new end on the cable. West Marine to the rescue. Most stores have a workbench with wire cutters, strippers, and crimpers that you can use on large wire. Note: with 4 AWG wire, it took Dave’s strength to cut the wire and crimp the new end. I simply was not strong enough to do it myself. We also bought and put the ends on a short jumper from the battery to the shunt. This should be the same size wire as you use to connect your batteries together and to connect the shunt to the bus bar.
Connect Power to the Shunt
The last step was to hook up the positive wire to the shunt and, in turn, to provide power for the monitor. The Victron battery monitor came with a large ring terminal on one end of the power wire and a straight crimp that looks almost like the end of a shoelace on the other, with a fuse in between. It’s best to take the fuse out while making the connections.
The straight end goes in a crimp connector on the shunt. To open it, press a spade (straight) screwdriver tip in the middle of the orange thingy (there’s a depression it’ll fit in), then slide the orange piece towards the shunt. That will open the hole. Stick the shoelace end in the hole — almost all the crimped end will go into the hole — then release the screwdriver. How this connection worked was the only part that I found non-intuitive . . . and of course the installation guide didn’t explain it, either.
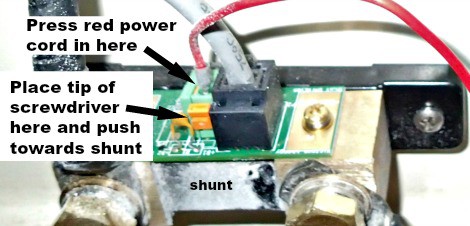
You can put the ring end either directly on a positive battery post or on the positive bus bar. If you put it on the bus bar, you may need to replace the large ring with a smaller one. If you put it on a battery, you can turn the monitor off by removing the fuse, but otherwise it’ll always be on. This was our choice.
Changing Parameters
Once you make all the connections between the batteries, shunt and Victron battery monitor, it’s time to reinstall the fuse. When you do, the display will turn on, and you’ll be prompted to enter the amp-hour capacity of the battery bank. If you are monitoring two banks, use the bank you have connected to the shunt.
At the same time, you can change the defaults for certain charge parameters and define how the monitor determines that the batteries are “fully charged.” You may want to change the defaults to better reflect your batteries and charging patterns, but if you don’t understand what the variables are, you can use the defaults and they’ll do a pretty good job. Read Nigel Calder to learn more about this. I’m certainly not an expert, and while I did change some of the parameters for our setup, I don’t know enough to tell others what to do.
One parameter that probably everyone should change is the “charge efficiency.” This reflects the amount of power lost due to voltage drops and other inefficiencies in the charging circuit. The default is 95%. From everything I read, 95% is pretty optimistic for real-world conditions and will lead you to believe that your batteries are down less than they really are. It has no effect on their actual state of charge, just on what the monitor reports. We used 85%. I’d rather err on the side of thinking our batteries were down more than they really were.
Bottom Line: Know Your Battery Usage
The end result of installing the Victron battery monitor? We ran the generator a lot less. We discovered that with our switch to LED lights and using solar lights in the cockpit (our refrigerator was propane), our solar panels are doing a better job of keeping up than we had guessed at. And that’s exactly why we wanted a monitor. t
Again, here are the links to buy the Victron battery monitors:
- Victron single battery bank monitors on Amazon (700)
- Victron dual battery bank monitors on Amazon (702)
Practical Advice For Cruisers From Cruisers
Hopefully, my experience helps you see that installing a battery monitor on your boat doesn’t have to be difficult. Each week, I share other practical tips and advice for cruisers in The Boat Galley newsletter. Subscribe so you never miss out.

Carolyn Shearlock has lived aboard full-time for 17 years, splitting her time between a Tayana 37 monohull and a Gemini 105 catamaran. She’s cruised over 14,000 miles, from Pacific Mexico and Central America to Florida and the Bahamas, gaining firsthand experience with the joys and challenges of life on the water.
Through The Boat Galley, Carolyn has helped thousands of people explore, prepare for, and enjoy life afloat. She shares her expertise as an instructor at Cruisers University, in leading boating publications, and through her bestselling book, The Boat Galley Cookbook. She is passionate about helping others embark on their liveaboard journey—making life on the water simpler, safer, and more enjoyable.
Leave a Reply