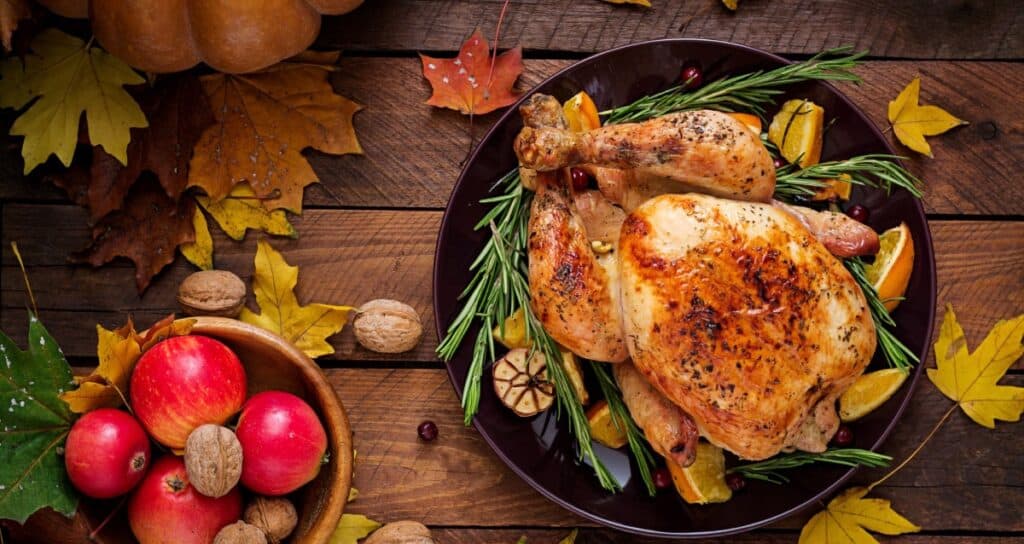
Celebrating the holidays on a boat? A roast chicken makes a great alternative to the traditional turkey. It fits most galley ovens. And, you can find them nearly anywhere in the world.
A roast chicken tastes similar. Plus the bird looks like a miniature turkey on the table and you can carve it in the same fashion. While roasting, the chicken fills the boat with a wonderful aroma — again, similar to turkey. And — best of all — whole chickens fit in most galley ovens. Furthermore, you can find one more easily than turkeys once you leave the United States. Roasting one is simple, too!
Roast Chicken on a Boat
There are all sorts of “options” for roasting a chicken. Use high heat or low heat. Tent it with foil. Or not. Truss it or roast on a rack or in the pan. And they all can produce great results. The problem with some of the recipes is that they just don’t work well in a boat oven that may have hot spots, may not be able to reach temperatures over 400, and so on.
This recipe opts for the lower temperature. First, boat ovens usually don’t have many problems cooking at 350, and hot spots are less noticeable at lower temperatures. It’s also flexible in the size of the bird and the seasonings used. Sometimes, you have to take what you can get! Don’t worry, it will still be delicious.
Prepping Ahead
In the following recipe, I’m assuming that you are buying a cleaned and dressed bird. If you buy one live, my experience is that whoever is selling it knows how to prepare it for cooking. Ask if they will do it for a small sum (or negotiate it in the price of the bird).
I recommend cooking dressing separately. If the bird is stuffed, there’s a little more chance of food poisoning. And while food poisoning is never any fun, it’s even more dangerous if you’re away from good medical facilities.
The Perfect Size
Plan on 3/4 to 1 pound of whole chicken per person. A 5 pound bird is a good size for 6 people. Whole chickens range in size from about three pounds (which will look small) to about 8 pounds.
It’s helpful to know how big the chicken is for timing how long it will take to cook it. If it’s not marked, you can weigh it with a fish scale (if you have one). Or compare it to the weight of a 5-pound sack of flour or sugar. Another good comparison is a half gallon of water — it weighs 4 pounds. If you don’t know, don’t worry — just check it for doneness a little sooner!
And you don’t have to wait for a holiday — roast chicken is good anytime you want a special meal!
Many of our recipes were developed while living and traveling off the grid. If you’re cooking on a boat, in an RV, or anywhere with limited space, power, or refrigeration, The Boat Galley Cookbook provides 800+ recipes using practical techniques that make everyday cooking easier.
See the Cookbook
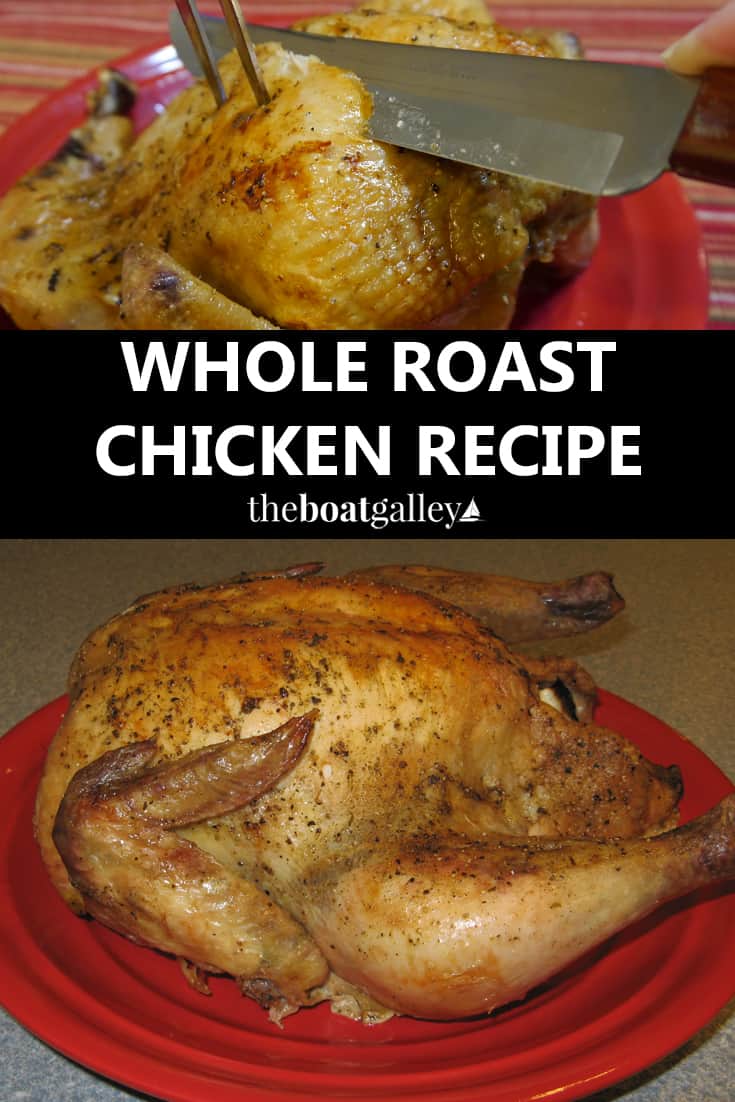
Whole Roast Chicken Recipe
Ingredients
- 1 whole chicken (A 5 pound chicken will serve about 6 people)
- 4 tablespoons butter (OR margarine OR canola oil OR vegetable oil)
- 1/2 teaspoon salt
- 1/8 teaspoon and pepper
- 1 teaspoon poultry seasoning (OR 3/4 teaspoon ground dried sage (or 3 teaspoons fresh chopped) plus 1/4 teaspoon ground dried thyme (or 1 teaspoon fresh chopped)
Instructions
- Preheat the oven to 350 while you’re preparing the bird.
- Begin by checking if there is anything in the cavity of the chicken — often there are packets with the liver or a gravy mix, or the neck might be stuffed in there. If you find anything, remove it.
- Reach inside the cavity and pull out any loose bits you find. Most of them will be along the backbone (the very rough bone — the breast bone is smooth opposite it). Usually, you’ll have to pull away the “lights” (lungs) — they look like little tiny pieces of liver. Even in the US, the lights are usually left in. It won’t hurt you to leave them or eat them, but you’ll notice a different taste. I’ll also usually find some loose bits of fat and maybe even some bone fragments.
- Pat the chicken dry — while I use bar rags for most things, this is one time I use paper towels!
- Rub the outside of the chicken all over with the butter. If possible, try to slip some of it under the skin on the breast (do this gently so you don’t tear the skin). Put the remaining butter in the cavity or rub the cavity with oil.
- Place celery, onion and/or garlic in the cavity if they are being used. Salt and pepper the inside of the cavity, too — even if you are limiting your sodium intake, try to use at least a little salt. Without it, the chicken just won’t have any flavor.
- If you have a roasting pan with a rack, use the rack. This will do two things: virtually eliminate problems with hot spots as the chicken won’t be sitting on the pan, and all the skin will be crispy, not just that on the top. Otherwise, just use any baking pan that the chicken will fit into.
- Place the chicken into the pan, breast side up (if in doubt, put your hand in the cavity — the rough backbone should be down and the smooth breast bone up). I prefer NOT to tuck wings under the body or tie the drumsticks together — while tucking and tying makes a tidy little package, it also makes it harder to have the drumsticks done before the breast meat is overly dry. Plus the drumsticks will have more crispy skin if they’re not tight against the body.
- Salt and pepper the outside of the chicken, then sprinkle the poultry seasoning over it (you can rub it in a little if you like). Don’t put foil over it, or water in the pan or anything.
- Put the bird in the oven and bake for approximately 20 minutes per pound. Unless the bird is really scrawny and lacking in fat, you don’t need to baste it. If you decide you should baste it, brush butter over the top every 30 minutes.
- The best test for doneness is an instant-read meat thermometer, inserted into the thickest part of the thigh but NOT touching bone. It should read 165 degrees.
- If you don’t have a meat thermometer, use all three of these tests: (1) the skin should be a dark golden color; (2) if you pierce the thigh with a fork, the juices should run clean without a rosy tint; and (3) if you can grasp the drumstick (it may be too hot), the socket should feel loose when you try to wiggle it.
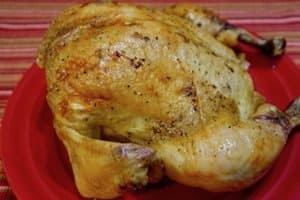
- Remove the pan from the oven and put the chicken on the serving dish (one advantage of a chicken over a turkey is that a chicken will usually fit on a dinner plate). Put a piece of foil over the top to keep it warm, and let it sit about 20 minutes while you prepare the gravy and other side dishes. This “sit time” will make it much easier to carve as well as making the meat juicier.
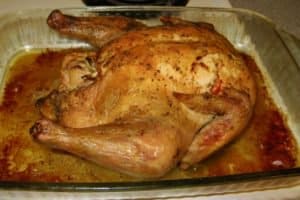
- In the photo below, you’ll notice that the drippings in the pan are carmelized and there really isn’t a lot of “juice.” This makes extremely flavorful gravy even though there isn’t much liquid — you may have to add broth or water.

Notes
Related Posts

Carolyn Shearlock has lived aboard full-time for 17 years, splitting her time between a Tayana 37 monohull and a Gemini 105 catamaran. She’s cruised over 14,000 miles, from Pacific Mexico and Central America to Florida and the Bahamas, gaining firsthand experience with the joys and challenges of life on the water.
Through The Boat Galley, Carolyn has helped thousands of people explore, prepare for, and enjoy life afloat. She shares her expertise as an instructor at Cruisers University, in leading boating publications, and through her bestselling book, The Boat Galley Cookbook. She is passionate about helping others embark on their liveaboard journey—making life on the water simpler, safer, and more enjoyable.
The Boat Galley says
Great story! I always measure pans before buying them, but never the meat!
The Boat Galley says
Another good idea!