
Step one in our boat interior renovation was to find the best teak cleaner and refinish all the interior wood. There were several problems that needed to be addressed. It was very dark. There were light places where previous owners had pictures. We had screw holes. And there was what can only be called a gunky buildup where hands had rubbed daily. And on what should be a gorgeous showpiece counter, there were black rings from where some set down a used can of oil..
In this article, I’ll talk about choosing a teak cleaner and finish system. In other posts, I show the step by step process I used to clean the teak, finish it and fill in all the screw holes.
Before
Here’s what I was starting with.
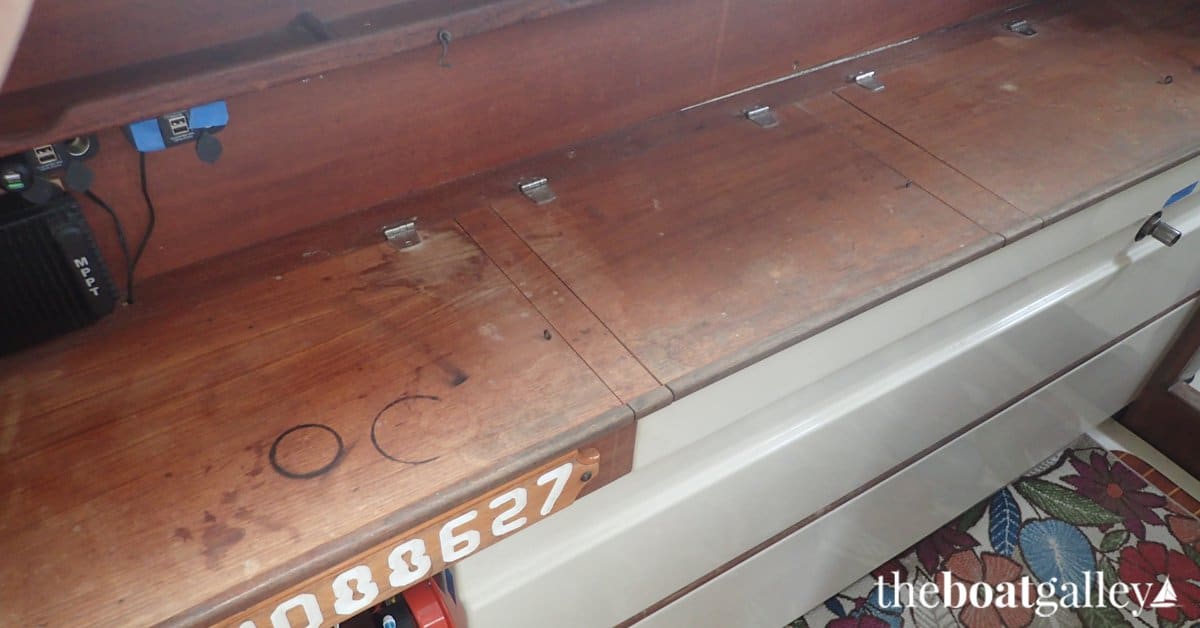
The rail next to the steps to go down into each hull was literally black with oil and gunk from hands grabbing it many times a day. The teak in many areas of the galley was also black.
Reviewing Teak Cleaner Options
My goal was to clean the teak so that the black was gone and it was a uniform color. Hopefully I’d get a nice light teak color, not the dark almost mahogany color that it had become. Then I wanted some sort of a finish on the teak to protect it and keep it looking nice.
To be honest, I didn’t know exactly what I wanted. I did know that I didn’t really want varnish. It tends to darken teak. And I wanted something that was easier to apply. I also didn’t want something that was prone to cracking and peeling.
Another option was Cetol, which gives a look similar to varnish. It just wasn’t the look I wanted. And it can also bubble, crack and peel.
I was looking for both a cleaner and a finish. And I knew that usually, it was best to use products designed to work together.
I knew that previous owners had used teak oil on it. I had found numerous partial bottles of different brands when we’d first moved aboard. But my basic research said that most teak oils simply fed mold and the blackening.
I’d used Semco on the teak on the exterior teak on our previous boat, Que Tal. Semco is very much like Thompson’s WaterSeal, but for teak on boats. Semco is extremely easy to apply, but I wasn’t sure it really was the look I wanted inside the boat.
And then there was the whole cleaning process. I knew this was going to be a big project. I wanted something that would work with a minimum of effort. But I also wanted something environmentally friendly. And since I was working inside the boat, I didn’t want anything that required massive hosing down or caustic chemical brews. I didn’t want anything that would hurt the gelcoat abutting the teak. I ruled out several two-part solutions. They were too harsh, not environmentally friendly, hard to use and potentially damaging to the gelcoat.
My Choice
I began researching and after a bunch of reading, discovered the Teak Guard family of products. The Super Cleaner got high marks for effectiveness and ease of use. And it was non-toxic and wouldn’t harm gelcoat. Further, it would actually kill any mold or mildew spores present. So the wood wouldn’t start blackening under my new finish. (I learned that solutions using bleach or TSP also won’t kill the mold and mildew.) I was somewhat skeptical of the claim that it took only 1/10 the labor of the company’s previous cleaner formulation. But it looked like the best option.
The Teak Guard Finish also looked like a winner. First, it would not feed mold and mildew. Second, it breathes. That means any moisture in the wood can simply escape rather than causing the finish to crack and peel. This was exactly the problem I wanted to avoid from varnish and Cetol. I absolutely did not want something that I would have to repeatedly clean or sand in the future. It was took much work. But also, most of our teak is thin veneer we can’t simply sand it many times before it disappears.
Much of the TeakGuard literature talks about using it for exterior applications (including boat decks). So I called the company to get a little more information. Yes, you can use it inside. For outside use, they recommend a maintenance coat every year. But as the interior gets far less UV, you would only need to treat it every two to three years when the finish started showing a haze. But there is no sanding or deep cleaning needed before the maintenance coats. Just wash it with soap and water.
The fact that Teak Guard produces a non-slippery finish was a bonus. I’d long wanted to redo the floors with something other than the varnish/urethane that was presently on them and eliminate the rugs. I wanted to see the beautiful teak and holly floors.
All in all, this sounded like the type of cleaner and finish that I wanted! There’s also the fact that I liked the look of Teak Guard Finish in their pictures.
The Process
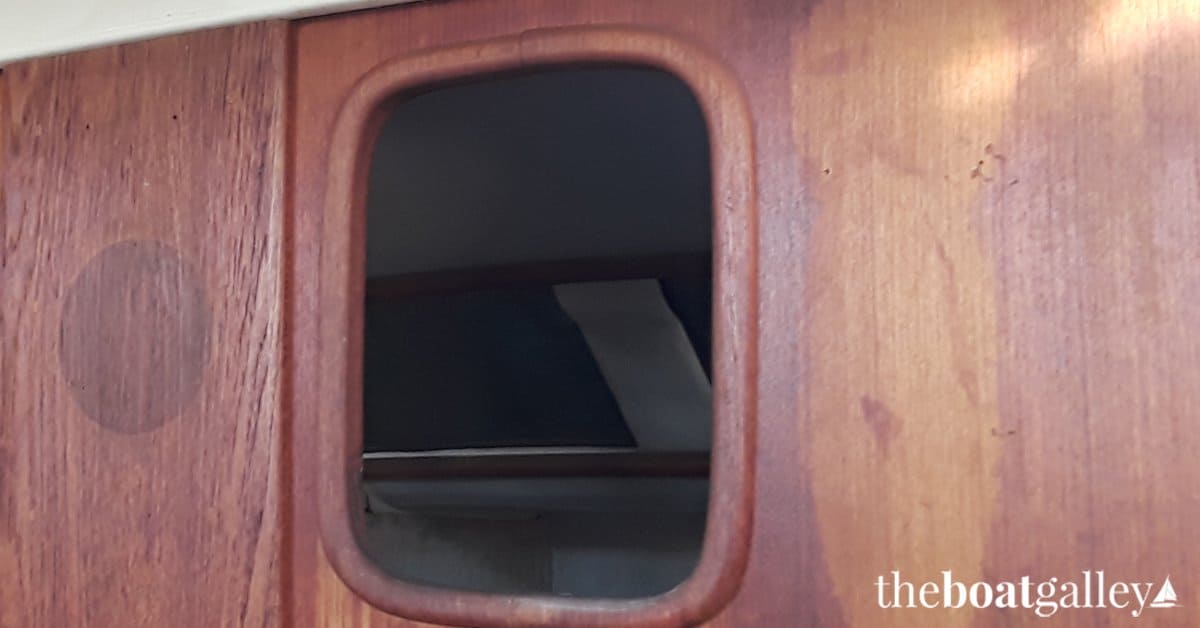
I ordered their “Starter Kit” and began by cleaning and finishing one sliding door handle to see how it worked and if we liked the look. Yes, we did! I continued with the project. Each day I cleaned a small area. I let it dry over night. And then put several coats of finish on over the following days.The company recommends waiting no more than a day between cleaning and finishing. That way the wood’s natural oils won’t rise to the surface and allow mold to begin forming again.
It is slightly cheaper to buy a small bottle of the Super Cleaner and one of the Finish than to buy the Starter Kit that includes various cleaning tools. I used their tools at first. They work well for teak that is less badly stained. Eventually, I ended up using a somewhat different technique for dealing with my really awful teak from the instructions they gave. I detail it and the tools I used here.
For any substantial amount of teak work, order their half gallon bottles are a far better deal. Because my teak was in such awful condition, needed about twice as much Super Cleaner than what their usage guidelines suggested. I put 4 coats of Finish on most vertical surfaces, 6 to 8 on horizontal surfaces and 10 to 12 on high traffic areas such as handholds and handles.
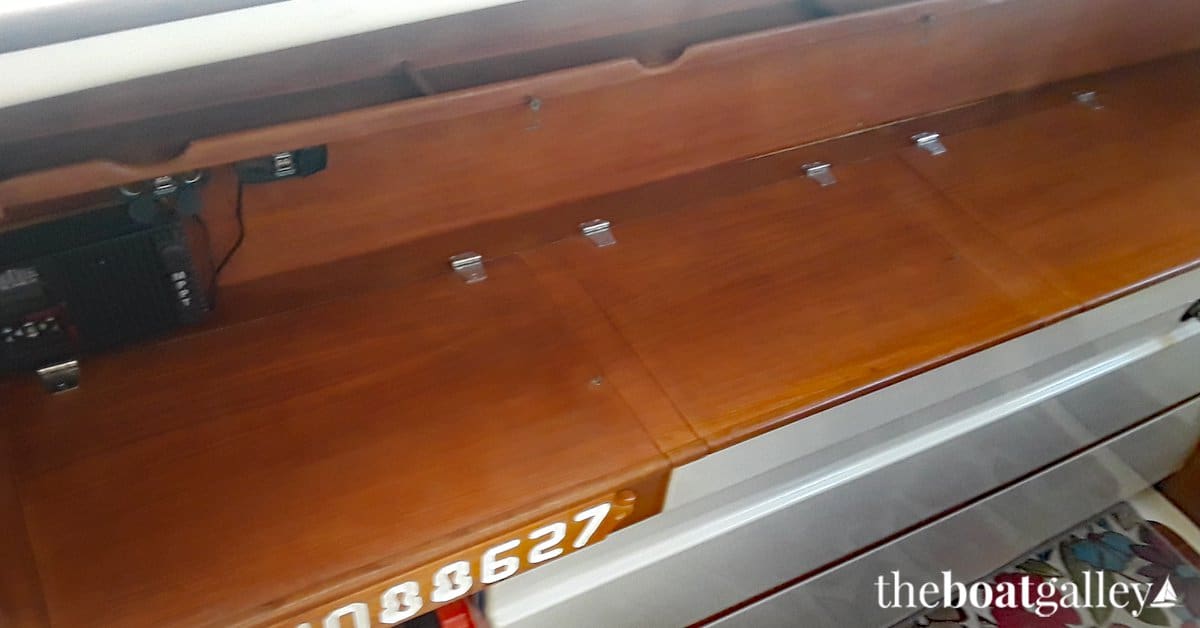
For now, I’ll show that counter as it was partially cleaned and then as it was when completely finished. The “before” picture is at the top of this article:
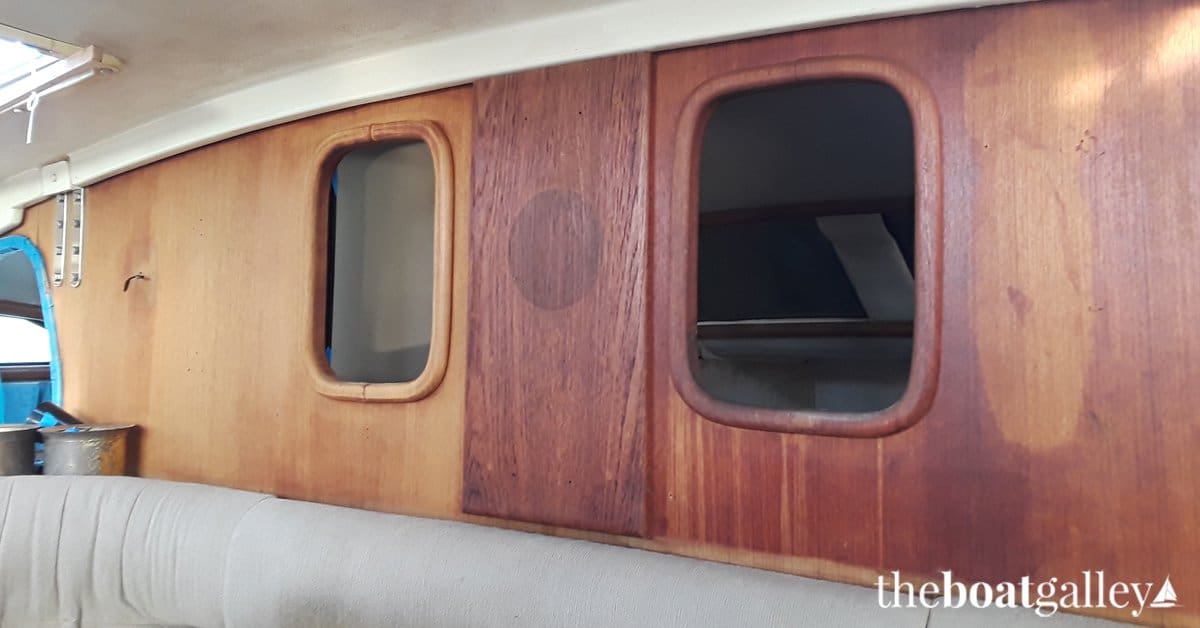
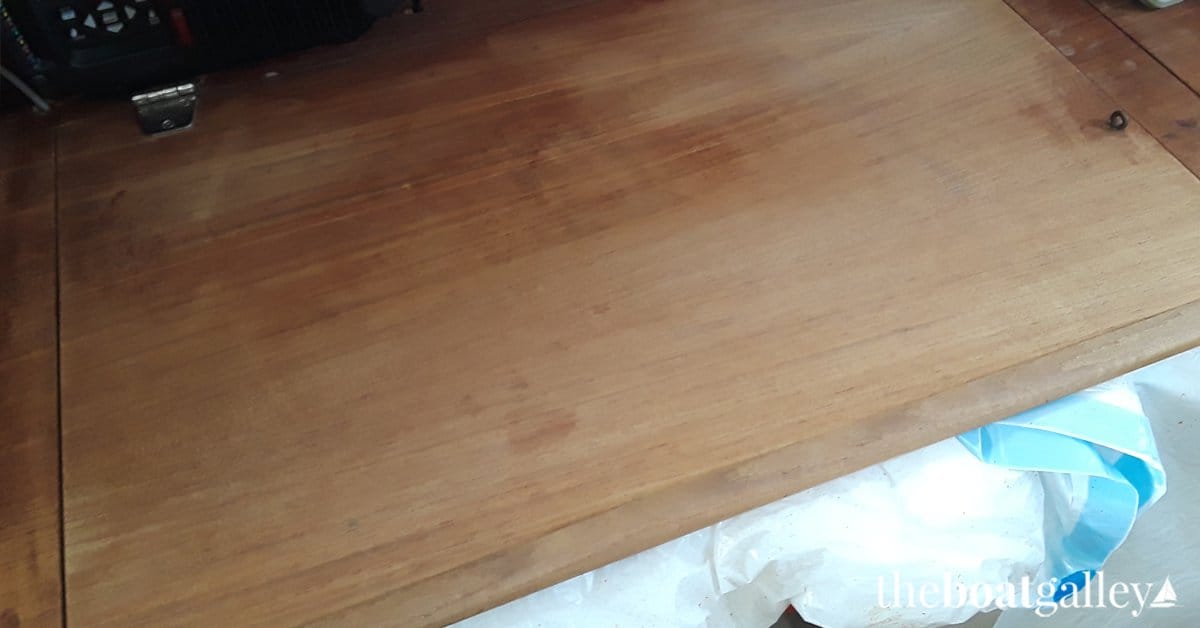
And here is the wall behind the settee, half “before” and half “after” the first pass of cleaning. I did still do a little more cleaning on the left-hand side so that it was an even color:
Note: I chose TeakGuard products through my own research and initially bought the products at retail. I felt highly impressed with how well they worked. So I contacted the company with before/after photos to show just how well it had worked. One thing led to another and they gave me additional amounts of their product to complete the job. After my good experience, TeakGuard decided to sponsor our podcast. Click the link for a special offer if you’d like to give it a try.
Related Posts


Carolyn Shearlock has lived aboard full-time for 17 years, splitting her time between a Tayana 37 monohull and a Gemini 105 catamaran. She’s cruised over 14,000 miles, from Pacific Mexico and Central America to Florida and the Bahamas, gaining firsthand experience with the joys and challenges of life on the water.
Through The Boat Galley, Carolyn has helped thousands of people explore, prepare for, and enjoy life afloat. She shares her expertise as an instructor at Cruisers University, in leading boating publications, and through her bestselling book, The Boat Galley Cookbook. She is passionate about helping others embark on their liveaboard journey—making life on the water simpler, safer, and more enjoyable.
Carolyn Shearlock says
It depends on the look you want. Semco looks like bare teak, but protected. TeakGuard looks more like a satin finish. TeakGuard needs one maintenance coat a year; Semco is going to need one every six months or so (depends on UV and rain for both). TeakGuard is a bit more slippery as far as using it on a deck would go, but still not truly “slippery” as long as you don’t sand the grain down. Teak Guard will take more coats for the initial application. Since I haven’t actually used TeakGuard on the exterior, I can’t say anything for certain . . . But if I had a boat such as our previous one with lots of exterior teak, I’d definitely try the TeakGuard as I really like the look of it and it was really designed for outdoor applications so it should be fine. And the breathable aspect means that it’s not going to crack and peel like varnish and Cetol.
Carolyn Shearlock says
When varnish starts to crack and peel, you have to sand it down to bare wood. Over time, you end up with less wood and can sand right through veneer. Also, varnish is MUCH trickier to apply well. TeakGuard is easy — see my info on applying it: Boat Renovation: Applying Teak Guard.
And if water sits on varnish for any length of time, the varnish will bubble. If it’s not repaired immediately, the wood will mold underneath. TeakGuard won’t bubble and won’t mold.
Carolyn Shearlock says
Can you find another soy stripper??
Carolyn Shearlock says
Yes, you have to go down to bare wood before using Teak Guard, and you MUST use the teak cleaner on it after getting to bare wood (or with new teak). The cleaner is designed to be used on bare wood, so no, it won’t damage it.
Greg Cantori says
As always great background and actual trials! Our 1984 Freedom was showing it’s interior age as well. Faced with the daunting work of striping and refinishing I experimented with a few stain only products which worked but were too dull. Then tried Restore a Finish. Like magic it’s a stain and finish in one wipe on and off. https://www.howardproducts.com/product/restor-a-finish/
Carolyn Shearlock says
Any of those can work but I’m not a fan of teak oil as it attracts dirt and mildew. My favorite, as I said in the article, is Teak Guard. It’s great.
Carolyn Shearlock says
The website is here: https://www.allguardproducts.com/ Their phone number is 800-448-8325
Carolyn Shearlock says
I used Semco on the exterior teak on our previous boat and think it’s great for that — it’s basically like Thompson’s WaterSeal, but for teak. I wanted a bit more glossy look for our interior teak and chose TeakGuard, which I also love. Both are MUCH easier to apply than varnish and don’t trap water underneath, leading to mold and flaking.
I’ve never used Formby’s. The interior teak on this boat had years of built-up teak oil (which Formby’s is) and was a black, gooey mess as it had never been cleaned between coats. I personally don’t like teak oil in general, as it tends to promote mold.
Carolyn Shearlock says
YAY! I think you’ll love the Gemini!
Yes, oxalic acid works well. For minor stains, you can use toilet bowl cleaner. FSR (Fiberglass Stain Remover) also works well.
Yes, Kilz will inhibit mold — we use it as primer everywhere in the boat and also use a mold inhibitor that’s a paint additive (pretty much any paint store in Florida will have their own brand of mold inhibitor additive).
Carolyn Shearlock says
I used several heavy-duty trash bags as “tarps” that I taped into position with blue tape.