
Prefer to read? Check out Semi DIY Stainless Tubing Projects.
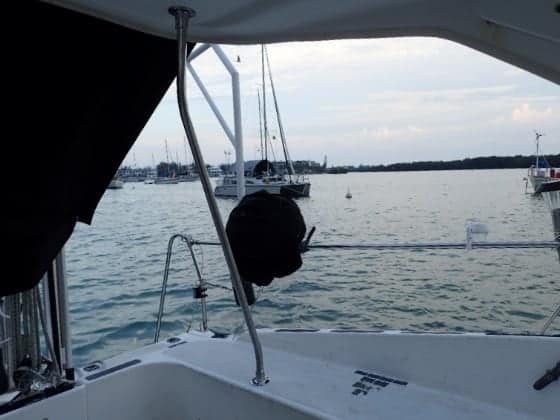
We’ve done several stainless tubing projects on Barefoot Gal: added bimini supports, made a mounting bar for the solar panel and, most recently, added a bar in place of a lifeline and beefed up our dinghy davits.
When we were on our previous boat and cruising in Mexico, we had such things designed, created and installed by professionals. And that’s what we originally assumed we’d do on Barefoot Gal.
Our first project was to add bimini supports. Newer Gemini catamarans have these from the factory, but ones of our vintage didn’t. However, the corner of the bimini is the logical thing that everyone grabs as they step into the cockpit. Not a good idea without a support.
While in Marathon, we approached one of the stainless welding shops to make these for us. It turned out that they had quite a backlog of work and would require us to be at a dock in a marina for several days (at over $100 a day!) while the work was done. The cost for their time was precious, too. It would have been close to a thousand dollars by the time they were complete.
We felt that we needed the supports, but the price just seemed steep. We broke the project down into parts:
- Design support with approximate measurements
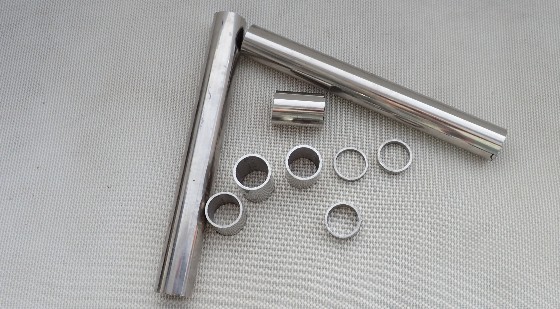
- Buy stainless tubing
- Buy end fittings
- Rough cut stainless tubing
- Bend tubing
- Dry mount and cut tubing to exact length
- Weld ends on
- Permanently mount
Okay, we could do most of it ourselves. We’d need help with bending the tubing and welding the ends. Dave found a young cruiser with a tubing bender, plenty of strong muscles, and experience. And there were plenty of welding shops.
Total cost for the project ended up being just over $200 and we did all while on a mooring ball instead of at a dock.
And with that, we began our “Semi-DIY” stainless tubing projects.
In talking to other cruisers, one thing that many don’t like about trying to do their own stainless work is that most of the fittings are secured with just an Allen set screw. If an end fitting is under tension (that is, trying to be pulled apart) or can swing or otherwise move, those set screws will loosen over time . . . and the whole structure can suddenly come apart.
That’s why they want it welded.
Dave had what I thought was a brilliant idea: we fit everything with the set screws, then disassemble it while leaving the end fittings in place with the set screws, and have the end fittings welded on. Since we’ve fitted it and put the set screws to hold it for the welder, he/she doesn’t need to come to the boat but can just weld it in their shop.

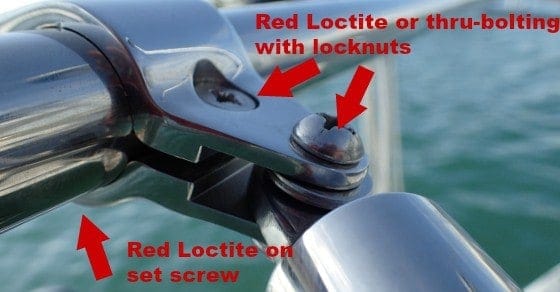
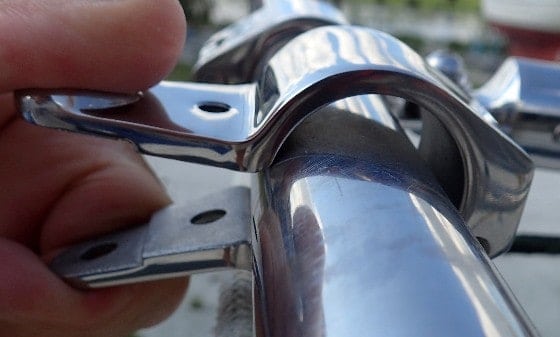
The clamps that go around another piece of tubing can sometimes be welded, sometimes not — it depends on whether you can take things apart. And occasionally you’ll find a welder willing to come to the boat at a dock or in a boatyard and weld up what you’ve put together. Most times, if the end fittings are welded on, that’s sufficient to keep things from falling apart. Hinged fittings should always be bolted with Loctite Red (the strongest permanent Loctite) or thru-bolted with locknut. They may slide a bit if the Allen set screw loosens (we use Red Loctite on those too), but that way they won’t come off.
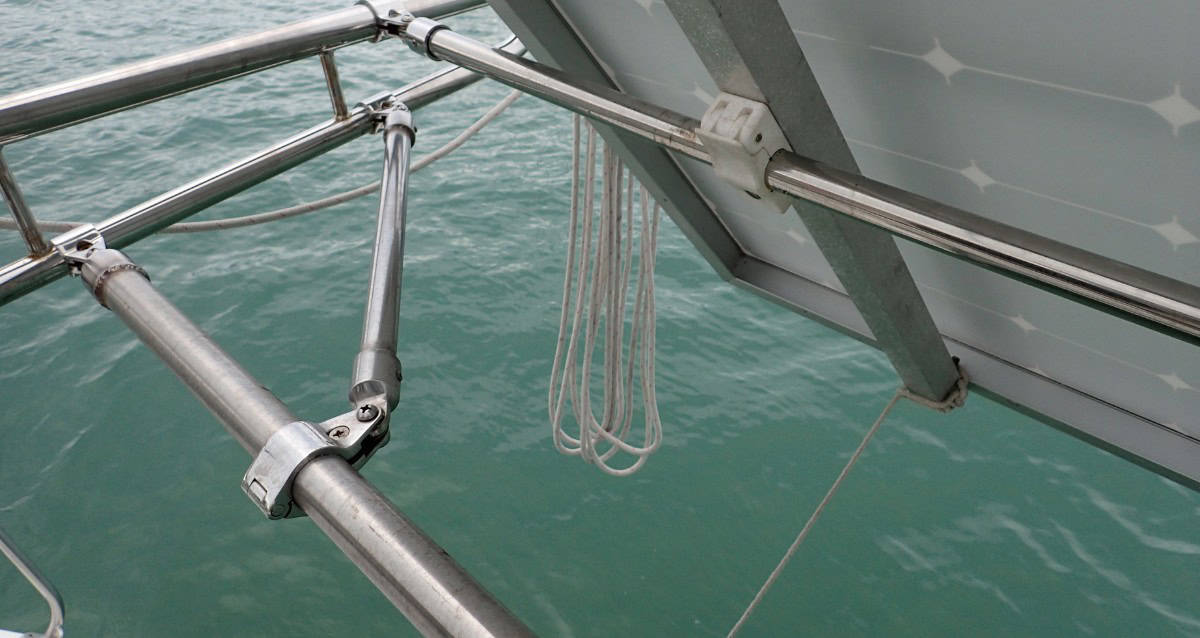
We also use Red Loctite or locknuts where one fitting is connected to another so that they won’t come apart with the movement of the boat. See also how we stabilize these connections.
We’ve found the “Semi-DIY” route to work well for us. I particularly like being able to buy the tubing ourselves instead of just relying on what the welder has on hand; I’ve been able to get higher grade and thicker wall tubing than most carry. This was very important in the bars that are beefing up and stabilizing our dinghy davits.
NOTE: it may be hard to take exact measurements for some projects. We take the approach that it’s best to make the initial piece too long and then cut it down as needed. With the curves for the bimini supports, we deliberately started with a piece that we thought was a good foot longer than we needed, and did the bends in the middle. Then we cut the ends off slightly longer than we thought was the “perfect” length . . . and then cut a little more. While it’s a pain to cut stainless tubing, we’d rather make a few extra cuts than make a piece too short.
SECOND NOTE: If making two of the “same” item — such as our bimini supports, one for the port side and one for starboard — never assume that the measurements will be the same. Most boats are not perfectly symmetrical. Measure both sides and double-check angles.
Sources for materials:
- Fittings (note: almost everyone calls these bimini fittings in their index even for items not used on biminis): my favorite is Sailrite — they have a huge selection and their parts just always are right; West Marine and Defender have a limited selection of parts; you can sometimes get good prices at MarinePartDepot but shipping can be slow and you can get some funky parts, such as these hinged jaw connectors with an offset hinge that would not go around the tube (I returned them; refunds are slow too):
- Tubing — your best bet is a local canvas or welding shop but they don’t always carry what you want. You can find a lot online but sometimes shipping is outrageous. In southeast Florida, try Bob Dean Supply — they were extremely helpful and the only place that could get the extremely thick wall tubing we needed for the davit beefing up at a price that seemed reasonable. Finding tubing has been my biggest challenge. In the Florida Keys, expect to pay $10 to $12 a foot for 1″ stainless tubing, more for heavy wall or larger sizes.
- Bending Tubing — most big shops won’t bend tubing unless they’re doing the design work. Small shops are more likely to be willing. Also look for young entrepreneurial cruisers (it takes strength and a concrete floor/sidewalk) who may have a conduit/tubing bender (if you are going to bend tubing yourself, don’t get thick wall). We found we had to go back for a second round of “adjustment” after dry-fitting the pieces.
- Welding — anywhere that cruisers congregate, you’ll find someone who can weld stainless (not every welding/machine shop does stainless). We’ve usually been able to get work done within a day or two and have typically paid about $10 per weld (local prices can be drastically different).
Going the semi-DIY route has worked well for us to get the strength of welding but at a price we can afford.

Carolyn Shearlock has lived aboard full-time for 17 years, splitting her time between a Tayana 37 monohull and a Gemini 105 catamaran. She’s cruised over 14,000 miles, from Pacific Mexico and Central America to Florida and the Bahamas, gaining firsthand experience with the joys and challenges of life on the water.
Through The Boat Galley, Carolyn has helped thousands of people explore, prepare for, and enjoy life afloat. She shares her expertise as an instructor at Cruisers University, in leading boating publications, and through her bestselling book, The Boat Galley Cookbook. She is passionate about helping others embark on their liveaboard journey—making life on the water simpler, safer, and more enjoyable.
Nathan Van Meter says
Our plan is to learn stainless & aluminum welding while still on land. It’ll be a good skill to sell / barter when we’re afloat. Help with the cruising kitty.
We’ll have to sell our 240V Mig welder & get a 120V unit to do it, but we think it’ll work out for us in the end.
The Boat Galley says
We’d love to run across a cruiser with a welding rig aboard!
steve k says
MarinePartsDepot gave me wonderful products and super service for the past 4 years.
They are our primary go-to source.
Fleet Marine Inc. Steve
Nathan Van Meter says
Give us 4 years, and it’ll be us! 🙂
Mike Robinson says
Great post. I just used the same method to change lifelines around cockpit to ss tubing. I found 1″ tubing at Defender for around $6/ft. Extra cost shipping.
Carolyn Shearlock says
Good job!
Court Crosby says
I remove the set screws and drill and tap the tube and lock the fitting in place with a machine screw. It is not as secure as welding but it won’t easily twist or pull apart. I also use tee connectors wherever I can to improve rigidity and reduce rattle.
Carolyn Shearlock says
I think that’s going to be our answer for one place!
Randy Asbill says
I’ve done several SS tubing fittings and secured them with JB Weld Epoxy and then added the setscrews. They have remained solid – some for several years. Welding is the ultimate fix, but JB Weld Epoxy is fast, easy and always available. Just be sure to sand and clean the ends of the tubing and the inside of the fittings.
Fair winds and following seas.
Windsong II says
We use 1″ tubing with off the shelf fittings to beef up Bimini frames, support solar panel etc. We cut the tubing square with a Rigid pipe cutter from Homedepot. If extra strength is needed we telescope 1″ and 7/8″ tubing, usually easier to buy than the thick walled. After everything is assembled and aligned we put two stainless steel pop rivets in each fitting. It seems to be a very strong joint. We made a frame for a 60 lb solar panel over our Bimini, I can do chin-ups on it !
Rob says
We also drill and tap the set screw holes for machine screws, and add a few dabs of clear silicone when assembling to eliminate rattling.
Don SV Minggat says
A friend needed to bend tubing to make. a second hand self steering windvane fit hs boat when we were in Mexico. I suggested a muffler shop.. That was large diameter tubing,, But if the shop has the adapters, that might be another consideration.
As far as setting up to weld stainless and aluminum goes, sure, everybody wants a friend with such capabilities. But cruisers are a tightwad bunch, who will buy you. drinks or dinner. But don’t plan on topping up the cruising kitty with it. Especially if you’re really cruising as opposed to finding one spot and planting yourself. And then you need to worry about governments that don’t like your idea.
Jim OConnell says
Great article! Some of my proudest boating accomplishments have been diy stainless steel tubing projects. Also, I couldn’t agree with you more about the lack of integrity from Marine Parts Depot. They sent me the wrong parts, refused to correct the situation, and then fought me on a refund. Might I suggest that you not include them in your list at all. They can be an absolute nightmare!
Alan Duffy says
Hi Carolyn, Really like the double bend design/style of the supports. Makes them look like a factory job. Interesting post.
In the past I have found a good place for stainless welding is auto exhaust replacement centers. They do very neat work, cheap, and very quick. All the work I have had done they did while I waited. You need to polish it up yourself.
James says
Very informative post! After reading I went about trying to locate a welder (someone gave me a bunch of thick-wall 1″ tubing). I have 4 welds to extend the stern rail at sharp angles. I can’t see any fittings working for this. Problem is, only one welder around here (Port Charlotte FL) that is interested in doing it. $85 an hour, which is fine. But, he seemed to think at least 45 minutes per weld! Wow.
Carolyn Shearlock says
WOW is right. Hard to say without seeing it (and I’m certainly not a welder), but that’s more than we’ve ever paid for welding.
Dave says
Great post! Thanks for the insights. It’d be great to see a few more photos of the entire bimini. I want to build a folding bimini so I can get the boat in a smaller storage location (low height) and I want it to be strong enough to tie down tubes, wake-boards and run 50mph without it breaking. I’m considering 7/8 stainless for strength, but I think I need thickwall – so how does that get bent?
Carolyn Shearlock says
Ours is a hard bimini so I don’t think it’s going to be of any use to you. For what you’re talking about, you are going to have to have it bent by a stainless fabricator — sometimes they are specialists, more often a welding shop.
Jeff Harding says
I have had very good results using Muggy Weld products to do my own welding using a propane torch on stainless and aluminum, check out there youtube videos, great products.
Chuck B says
Thank you for this, very useful & informative! Which red Loctite do you use? I looked into it recently and it seemed all the red Loctites required a primer before being applied to stainless steel.
Carolyn Shearlock says
The quick-drying one specifically says it’s primerless: https://amzn.to/3bQBgUZ
However, we’ve used the regular red Loctite (https://amzn.to/2T5mp0i) for years without primer. It’s only recently that I’ve heard anything about using a primer with it — and my old bottle doesn’t mention it.
Scott Whitcher says
I was on a friend’s Gemini 105 when the dinghy picked up enough water that, with the sea’s pounding, pushed the rear davit support through one of the stern ends of the hull.
I highly recommend going into the end of the hulls, removing all bolts and backing plates and laying up a large “patch” about 3/16 to 1/4″ thick onto the inside of the area that supports the davits. Put it back together with the backing plate and longer bolts, if needed and new sealant.
He did all this to his. One side preventively, the other while repairing the hull.
Carolyn Shearlock says
Yes, that can be a problem on the 105MC’s — not sure if they correctly that on the Legacy’s or not. Ours is a 105M and the davits are attached with an L bracket so that there is nothing below the davit support and thus it can’t punch through. We’ve met one 105MC that had the exact problem you’re describing.