In late 2019, Dave and I were planning to leave the Florida Keys around the first of the year and wanted to be in Washington, DC about March 15. We knew it’s going to be a chilly trip and possibly rainy. A cockpit enclosure seemed the perfect way to keep us a fair degree warmer and drier.
When I got bids for a cockpit enclosure from a couple of local canvas shops, I was floored. $8,000 to $10,000 for a custom cockpit enclosure. We have a catamaran, with a decent-sized cockpit, but it’s not huge. The whole boat is only 34 feet long by 14 feet wide; the cockpit about 5 feet long by 8 wide. We could buy an awful lot of long underwear for that kind of money! It was totally out of our budget.
A few days later, I dinghied by a friend’s catamaran and was intrigued by the shade enclosure they had on their cockpit. They’d gotten shade tarps such as are used in commercial growing operations and draped them over their hard bimini and tied them into place.
Hmm. Could I get clear plastic tarps and do something similar?
A few internet searches and I decided that I could make a serviceable cockpit enclosure for less than $500!
Admittedly, it wouldn’t be as fancy or “perfect” as one made by a canvas shop. And it would be unlikely to last as long. But we envision this trip as a one-time thing, not something we do every year. So I only need something that will last a year, for the trip north this winter/spring and the trip south next fall/winter.
Every boat is different, but here are photos and a parts list for what I did. Hopefully, it will give you ideas for what you might be able to do on your own boat.
Including paying for the sewing, the total cost of this project was just under $550 and we are thrilled with how it turned out.
Basic Idea
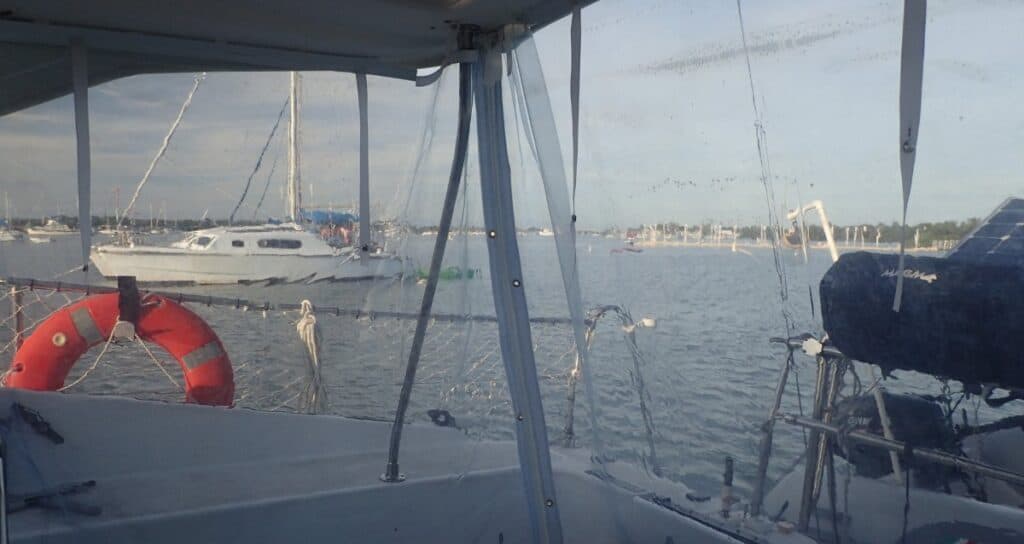
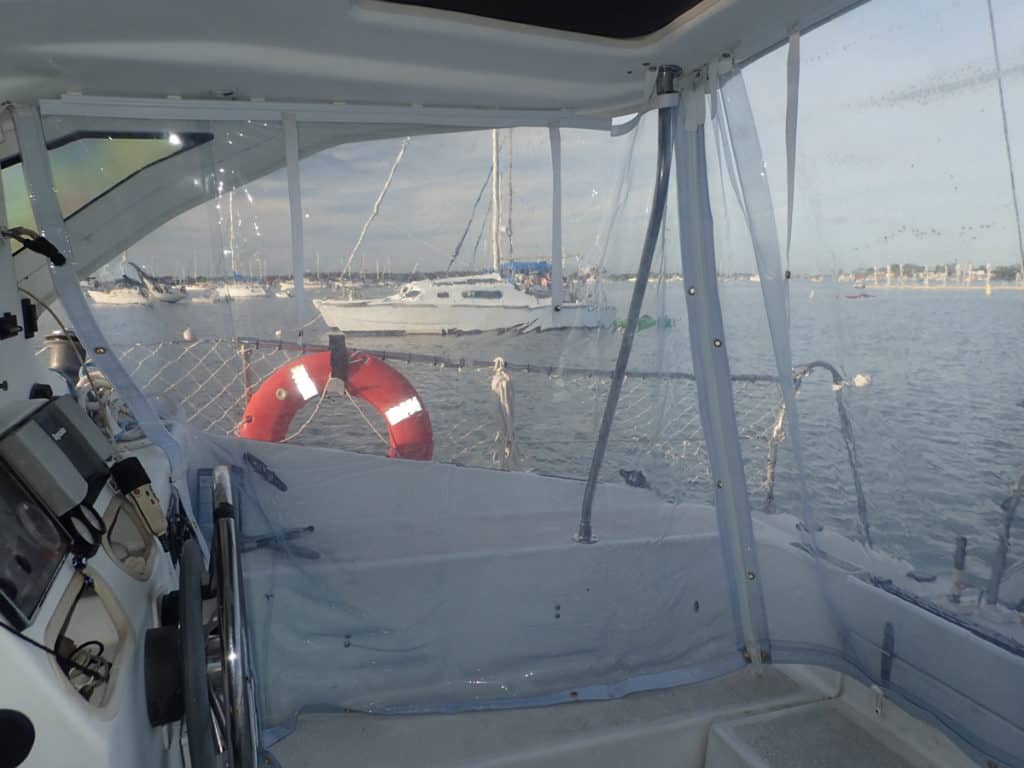
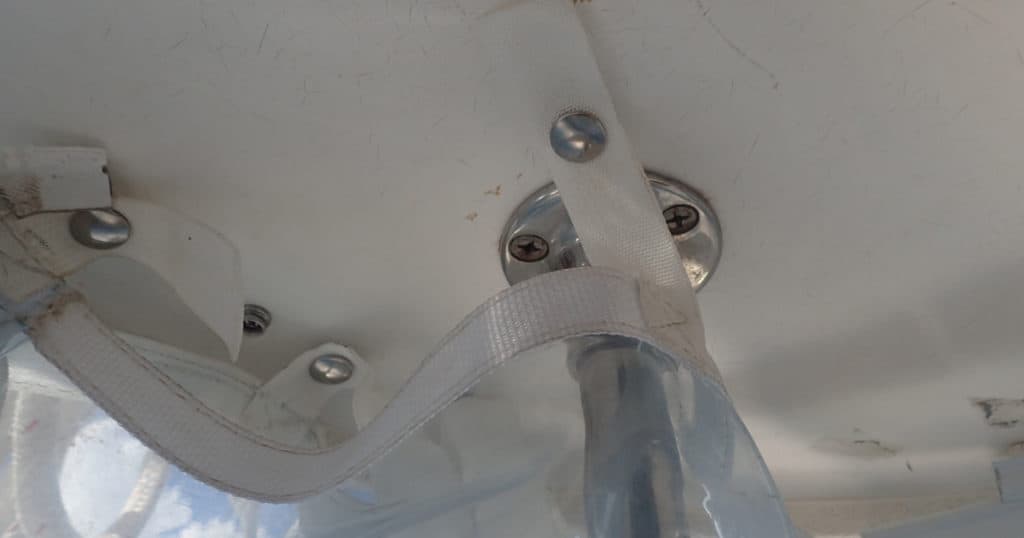
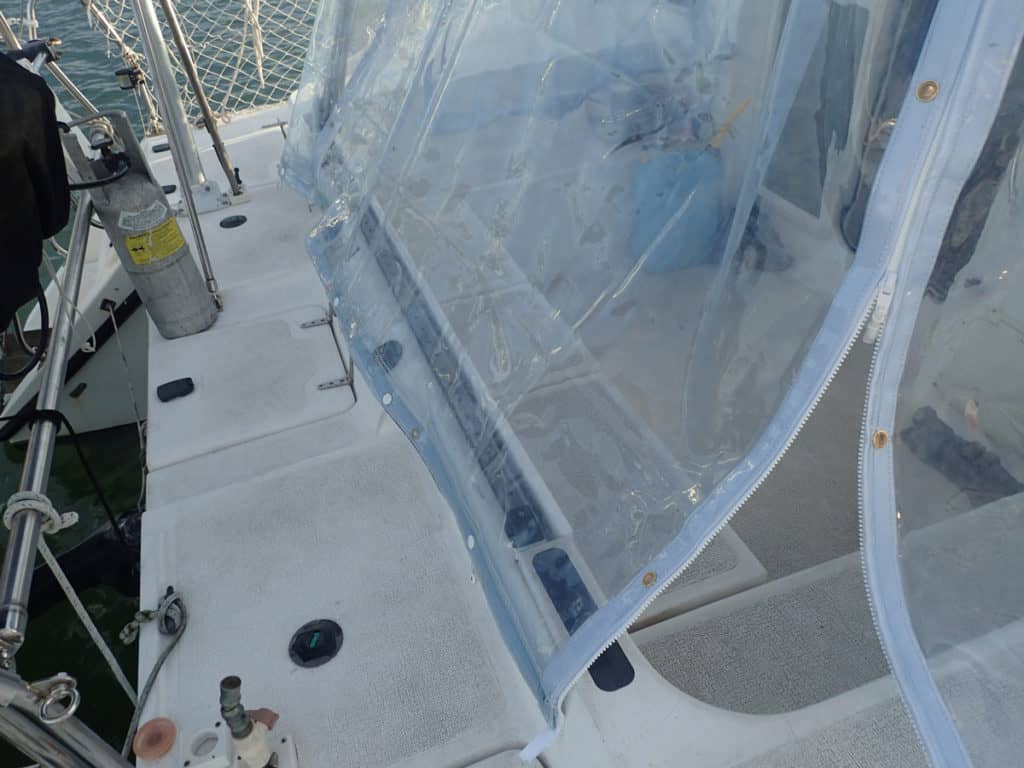
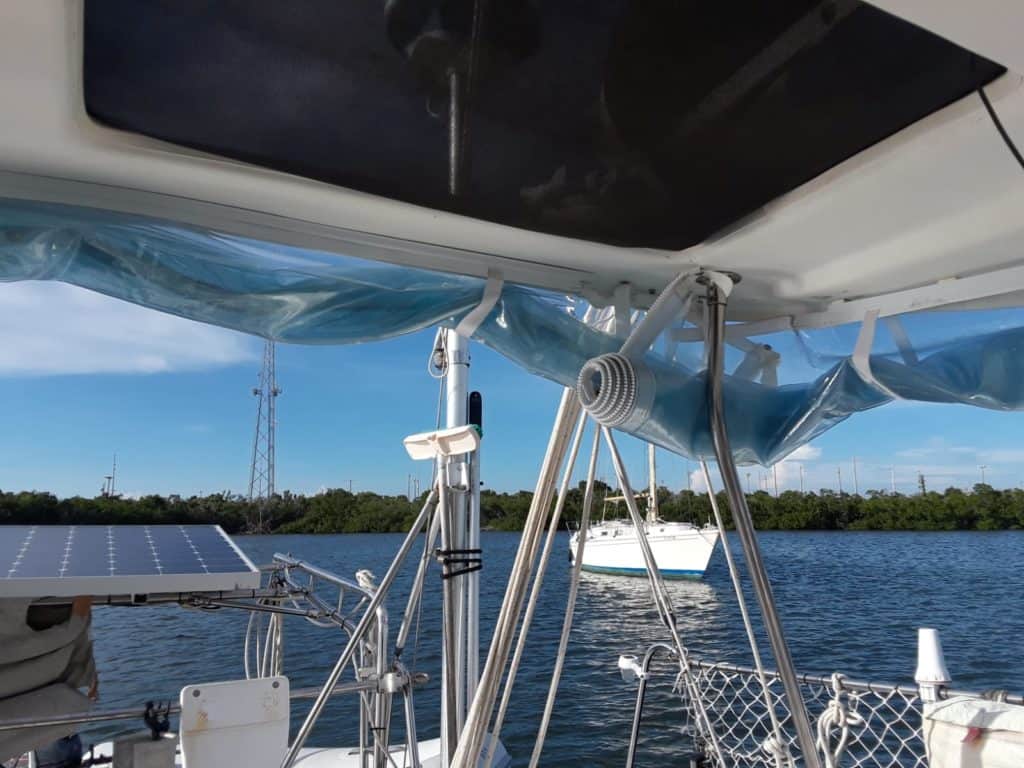
I bought three clear plastic 30-mil tarps — one for each side of the cockpit and one for the rear. We put track on the underside of our hard bimini and sewed awning rope to the top of the tarps, which then slid into the tracks. On the curved sections, I used webbing straps with snaps to hold the tarps up. I put full-length zippers in both corners to make it easy to get in and out of the cockpit. And we added a few more straps with snaps and bungee hold-downs to keep the front and bottom edges of the tarps in place.
NOTE: Now having done this project, I think tracks are the way to do it to distribute the weight of the tarps. I had originally thought of just using snaps and I don’t think they would have held, particularly in any wind.
Before you get the wrong idea, these tarps aren’t thin like cleap drop cloths. They’re very heavy duty, such as you see at outdoor restaurants for use on cool or rainy days. Admittedly, they’re not as optically perfect as Strataglass but they will work for us — we look out through a true windshield for steering. The view out is pretty good and they turn the cockpit into a greenhouse of warmth!
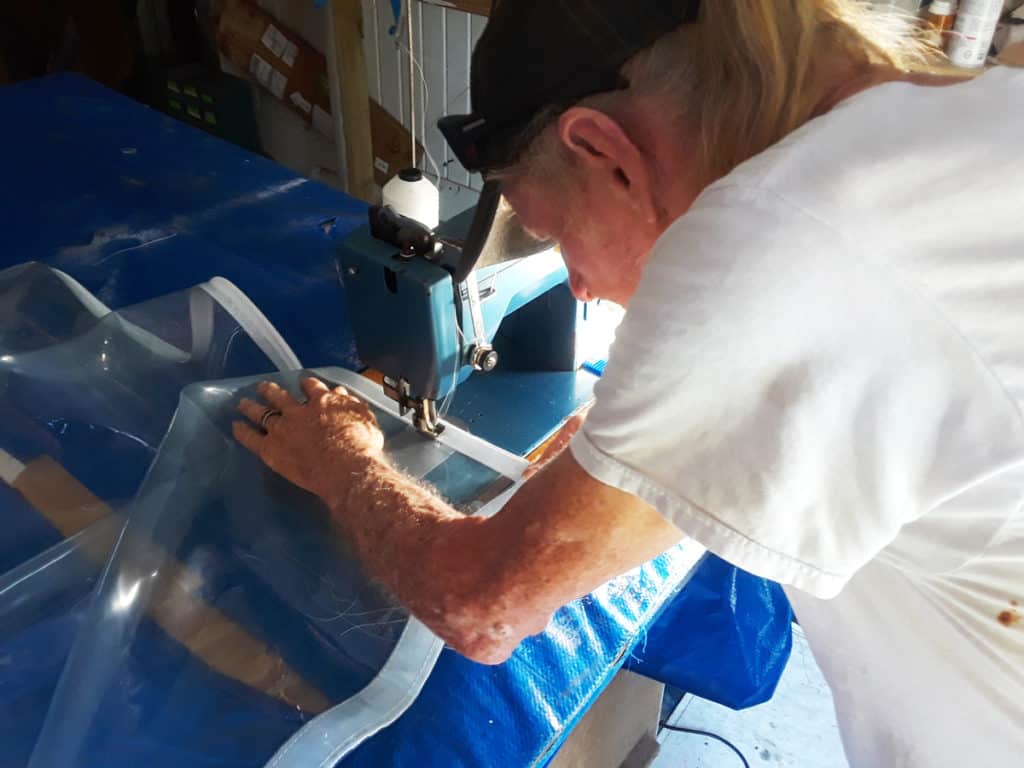
IMPORTANT: I had planned to do all the sewing myself on my trusty Singer sewing machine. The Singer simply wasn’t up to the task, and I ended up paying Keith Portman — aka “Stitch” — $120 to do the sewing. I did all the design and basting, and helped with handling the large panels on the table, which reduced his time.
TIME: It took about 25 hours of Dave’s and my time, plus the sewing that I hired Keith for, to complete this project.
Pictures

I cut off the top hem on the tarps and attached the awning rope where it would fit into the track and added roll-up straps. We sewed webbing along the top edge of the tarp where there wasn’t the awning rope to reinforce it. Then I made webbing straps and used snaps to hang the ends of the tarps and go around curves. I also used a few snaps to attach the front edge to the cockpit “wall.” Instead of trying to match the enclosure to the curve of the front edge of the bimini, I simply hung it inside and kept the angles all fairly square.
NOTE: if you have a fabric bimini, you can also get track that you can sew onto your bimini and hang tarps from that.
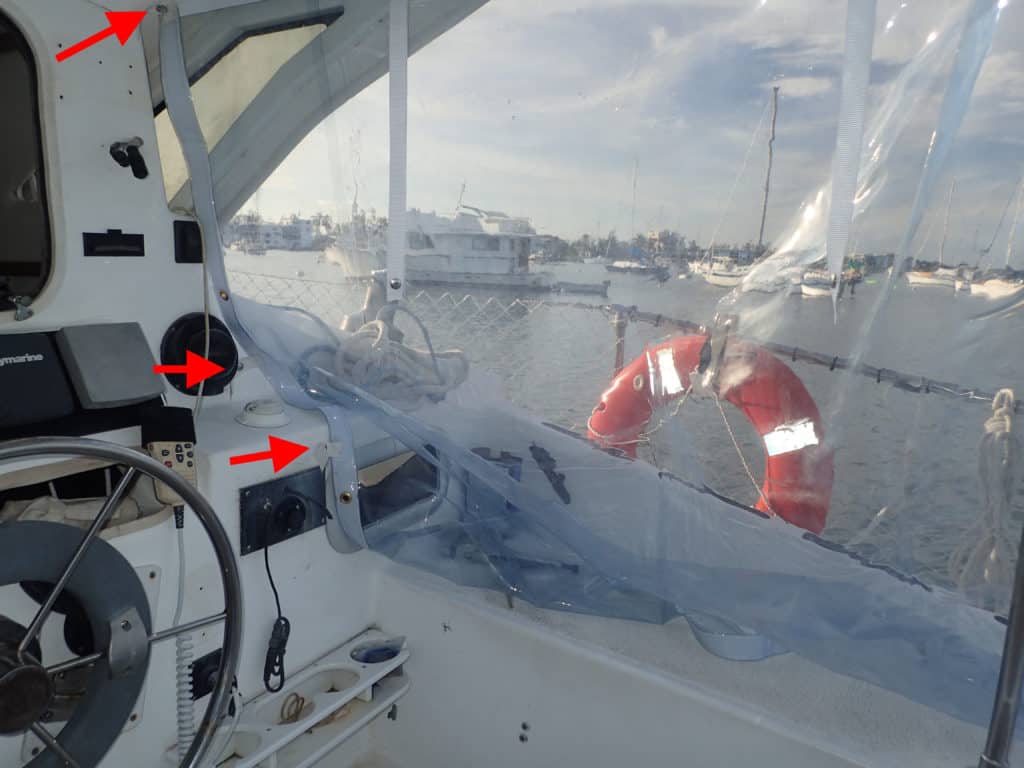
The back tarp was a foot longer than the side tarps, and once I verified that it would be okay with the shorter length, I cut it to match. I then cut the hem off the discarded piece and sewed it back on in order to have a reinforced lower edge. Finally, we added heavy zippers to both corners.
I had never used basting tape on a project before. It is essential to a project like this — there is absolutely no way you can pin anything to the tarps as they are so thick. Basting tape makes it all so easy — I absolutely love it!
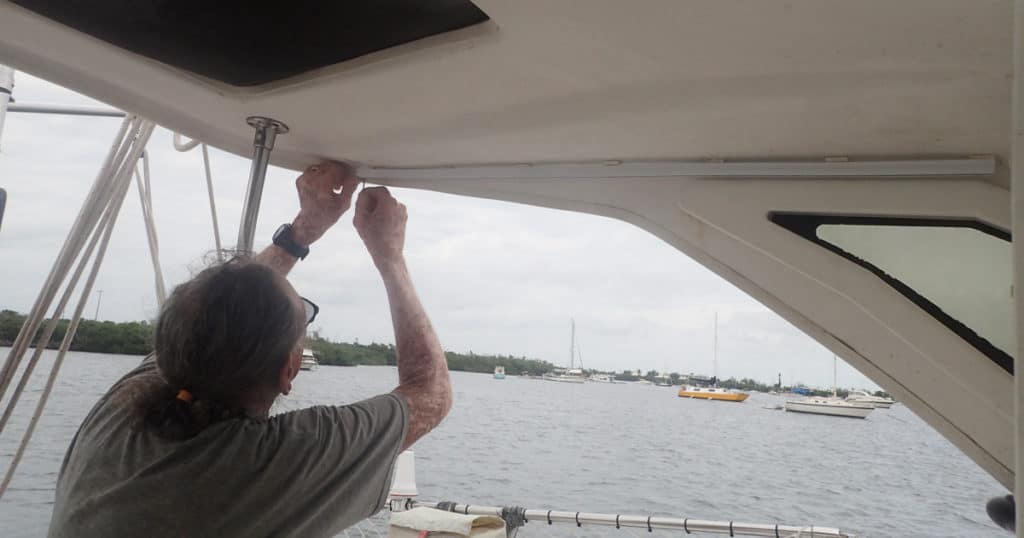
Back to the boat where we installed the enclosure and put all the snaps onto the webbing tabs and on the boat. Keith, the local canvas maker who helped me, loaned me his Press-a-Snap tool, which is infinitely easier to use than having to hammer each one in (I’ve done that on previous projects and it works and is a lot cheaper if you can’t find someone to loan or rent the Press-a-Snap tool).
Finally, we put the bungee loops on the bottom. These are extremely easy to install and work really well in places where you want a little give so as not to strain the material.
Sailrite has extremely good videos on how to install the awning track and rope, snaps and the bungee loops (called shock cord cover loops). Watch them before doing any of the work!
While I had the basic idea in my head when I bought the materials, it’s important to note that the fine points of the design were decided as I worked on the project and put it up for numerous test fittings.
Materials
Tarps
TarpsNow had the best selection and pricing on heavy-duty clear vinyl tarps I could find. I used two of their 5×5 tarps and one 6×8, for a total cost of $220, including shipping.
Sailrite
I purchased everything else from Sailrite. I actually ordered too much of some things and was able to sell the surplus to other cruisers, but my best guess for the cost of what I did use was about $200. This included:
- Long industrial-strength zippers (lengths to 15 feet available)
- Zipper pull tabs
- Snap sets (if you don’t already have one, get a Snap Installation Tool or Press-A-Snap and the right size hole cutter) — these have the male part as a screw in, and the female part to be installed in fabric; other combinations of screw-in and fabric are available
- Flex-a-Rail (track) — 44″ and 90″ are available; 90″ sections are expensive to ship and you can put the 44″ sections together easily
- Screws for Flex-a-Rail (they’re special)
- Vinyl awning rope
- Polyester webbing
- Shock cord cover clips
- Knobs for shock cord cover clips (need 1″ long #8 pan head screws for these – buy separately)
- Hole cutter for the shock cord cover clips
- Basting tape
If you’ll be doing your own sewing, don’t forget thread and heavy-duty sewing machine needles. While a hot knife would have been handy on all the webbing pieces, I cut it with scissors and then melted the ends with a butane lighter.
The zippers are stiff and hard to operate at first. I put a little zipper lubricant (Amazon) on both and they slid much more easily.
Clean and protect the clear plastic with a product such as Imar Strataglass cleaner (Amazon). In a pinch, you can use Pledge as a protectant but clean the plastic first so that you don’t scratch it with any dirt that is on it.
Always let the plastic dry before rolling it.
Bottom Line
Our trip got derailed by the pandemic, but the cockpit enclosure was fantastic and we used it every winter until we sold the boat. It will kept us basically warm and dry (yes, there are places that air and rain can still get in) for a fraction of the cost of a “perfect” solution. From the outside, you almost can’t tell it’s there since there is no canvas. I had originally thought this would be a one- or two-year solution. We sold the boat after three years, and it was in great shape then and the new owner tells me it’s still going strong now!
You Might Also Be Wondering About . . .


Carolyn Shearlock has lived aboard full-time for 17 years, splitting her time between a Tayana 37 monohull and a Gemini 105 catamaran. She’s cruised over 14,000 miles, from Pacific Mexico and Central America to Florida and the Bahamas, gaining firsthand experience with the joys and challenges of life on the water.
Through The Boat Galley, Carolyn has helped thousands of people explore, prepare for, and enjoy life afloat. She shares her expertise as an instructor at Cruisers University, in leading boating publications, and through her bestselling book, The Boat Galley Cookbook. She is passionate about helping others embark on their liveaboard journey—making life on the water simpler, safer, and more enjoyable.
Winston Donahue says
Timely article, just what I needed. Thanks
Eric P says
Remember to roll the plastic sheeting down and let it relax every couple of weeks or it will crease and crack.
Kate says
Great job, Carolyn. You’ve given me a few more ideas for similar projects with your details.
Kate
Bob Mirabal says
Awesome, you understand how many of us “survive” in the boating world when the size of our checkbooks doesn’t match the size of our boating aspirations! Pls. let us know how they work out this winter.
Minta Fannon says
Love it! We actually made an enclosure for approx. $100. We went to Walmart and bought plastic off the roll in the fabric department at less than $3 a yard. I think I got 9 yards. We bought a roll of industrial strength velcro,$49, also at Walmart, for the vertical seams. And we did snaps with my Sailrite snap tool, along the top to connect to our older Bimini. We had the same goal to just stay warm as we went south and it is amazing what a difference. We have since redone all our canvas and made a full enclosure that should last for years. But with a little “Hillbilly ingenuity” that first trip south was warm and dry!
Kristina Urick says
I would love to see pictures🙏🏽
Rachael Bohannon says
Yay! Good job, long zippers can be tricky to keep the teeth matched & I’m sure that local canvas person had some little knowledge nuggets of gold to share. Like you said in the article – you got a good result only after re-fitting a number of times. This is where actually sewing etc on the boat can be a lot easier, when possible. Nice to be able to avoid making templates. Congrats, and great helpful article as always!
Lora Murphy says
Hey, you did a great job. I’m sure you have found out it is a learning experience. These days, there is so much info out there to help, but it’s not rocket science, just patience and practice.
Roll your curtains up and down carefully when it is cold. If you get any scratches, you can use toothpaste to take small ones out.
Hope you have a great trip!! It definitely will be a lot warmer.
Martiel says
Thank you so much for this info. We have a custom cat we built and after asking around really do not want to invest 13-$15000m for an enclosure. I have been trying to figure out how to do this knowing it would not be perfect but wanting it nice looking. You have simplified it and relieved some of the though process. Thank you! Have a wonderful loop!
Michael Weaver says
Thanks for a very timely article. I made a cover last year out of reinforced clear polyethylene and it lasted one year but eventually weakened and needed to be replaced. I went with a heavy duty white poly tarp this season but yesterday’s gale force winds made quick work of it so it’s back to the drawing board here. I like the looks of your version and will give it a try. I appreciate the clear (no pun intended…) instructions and your sharing the benefit of your own experience.
Cheers,
Michael
Carolyn Shearlock says
Ours has now held up for two winters, with occasional squalls and gusts in the 40’s, maybe a couple in the 50’s.