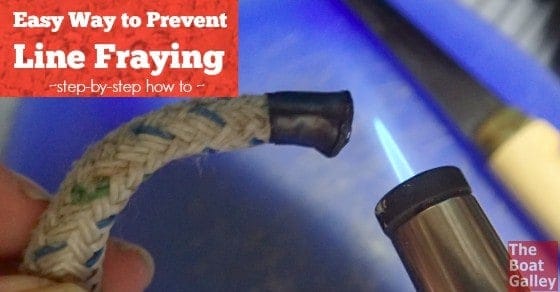
I’m the designated line-burner on the boat. Not quite sure how I got this fine honor, but it’s important to keep all the lines and shock cords from fraying, and burning (or really melting) the ends works well for most lines.
I actually learned the basics back in Girl Scouts when I was in grade school (yes, back when you could teach a kid to use a lighter!), and have refined the technique for even better results since then.
This is how we keep all our lines from fraying whether in use on the boat or bits in the “spare line” bag (with one exception, see below). Ditto for shock cord that we’ve cut. You can whip the ends of lines (which we do on our sheets), but we find this works well for and takes almost no time.
Here’s how I do it, along with various tips (and please add your own tips in the comments — I’m always looking to learn new things):
- To make it easier to see, I’m doing this on a spare line and in the galley. Often, though, I’m doing it with the line actually in use. We’ll run a new piece of line that’s longer than what’s needed, then I cut and burn it just beyond a knot.
- Some of the new no-stretch lines such as Dyneema and Spectra do not melt and this technique does not work on them. You have to either backsplice those or use heat-shrink tubing.
- Tools and supplies —
- Electrical tape
- Very sharp knife and cutting board or scissors (I use my Rappela fillet knife — see it on Amazon — makes a cleaner cut than anything else I’ve ever used).
- Butane torch — you can use a long-nose lighter, but they tend to go out in even a gentle breeze. I have a Blazer Stingray Butane Torch we also use for heat-shrink tubing on electrical projects. It’s more expensive than some other butane torches but works perfectly every time. We previously had an Ancor Mini Butane Torch, which costs about a third less (and is called “marine”) and it just didn’t work well at all (we actually were stupid enough to buy a second one when we were in Mexico as it was all we could find — the second one died faster than the first). If you’re going to buy one, get the better one. Also get a spare can of butane — it’s cheap and horribly frustrating to run out in the middle of a project!
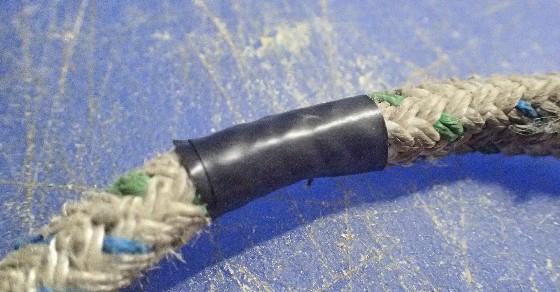
- Begin by double-wrapping electrical tape around where you want to cut the line. Pull it tight and don’t just tear the tape — cut the end so it’s nice and finished looking. Getting the tape tight and smooth is key to having a nice-looking end.
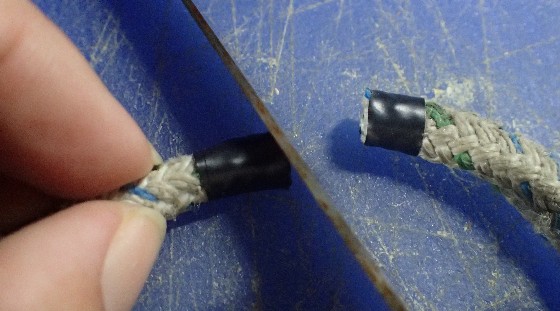
- Cut the line in the middle of the tape — you want as clean a cut as possible. Admittedly, you can’t always do it on a cutting board — but even if you’re just doubling the line and cutting through the loop, a really sharp knife will provide quite a clean cut. Dull knives or scissors won’t. And be ure to cut it in the middle of the tape so both freshly cut ends are taped.
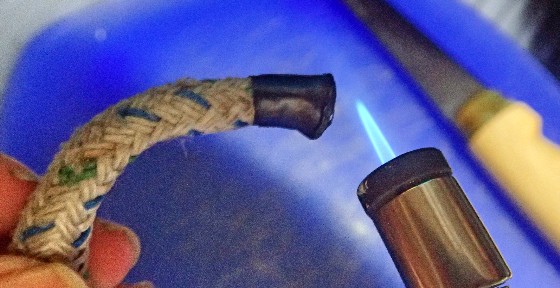
- Leave the tape on. Light the burner and pass the end of the line through the flame to just melt the ends of the fibers. You don’t want the line to actually catch on fire, but it can happen. Just blow it out. With experience, you’ll be able to judge how close to put the line to the flame and how to pass it back and forth through the flame so it melts and doesn’t catch fire.
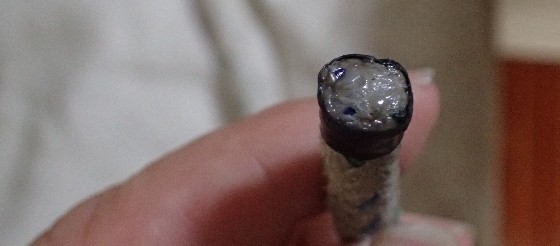
- That’s it — you’re done! Be sure to do the other half of the cut. NOTE: If you accidentally caught the line on fire, the end will be black but you’ll still see all the fibers melted together.
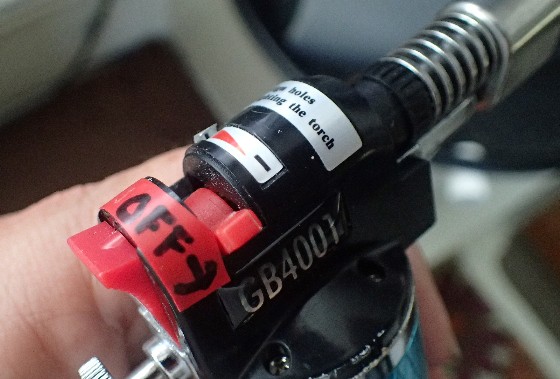
If you get the Blazer Stingray Torch — it’s designed so that it can be used hands-free (in other words, letting go of the igniter does not stop the flame). To turn it off, you turn the fuel down to zero. Because it’s not intuitive (we’re all used to lighters that go out when you release the trigger), and not marked, I made my own label to remind me:
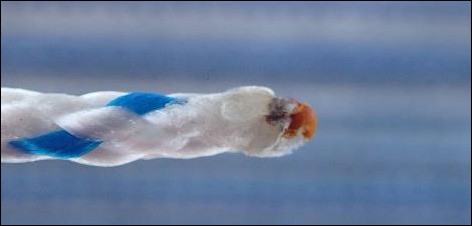
Now for an advanced technique to make a “pointy” end where you need to thread the end of the line through something . . . Dave cringes every time I do this but I’ve never had a burn!
- Don’t tape the end, but do cut it cleanly. If you want (and can), cut the end at a bit of an angle.
- Work the flame back and forth over the last inch or so of the line and get it melting.
- VERY quickly, put down the burner and lick your fingers (or dunk them in a cup of water) and then run them from the line to the tip to make a point out of the melting fibers.
This is easiest to do on “cheap” line such as polypropylene and nylon, but also works on polyester. It’s hard to do on double braid since the two layers want to melt separately if you don’t have tape around the cut. If you need to make a point on double braid, you’re better off spiraling electrical tape from a couple inches behind the end to an inch or more after the end and working it into a point.

Carolyn Shearlock has lived aboard full-time for 17 years, splitting her time between a Tayana 37 monohull and a Gemini 105 catamaran. She’s cruised over 14,000 miles, from Pacific Mexico and Central America to Florida and the Bahamas, gaining firsthand experience with the joys and challenges of life on the water.
Through The Boat Galley, Carolyn has helped thousands of people explore, prepare for, and enjoy life afloat. She shares her expertise as an instructor at Cruisers University, in leading boating publications, and through her bestselling book, The Boat Galley Cookbook. She is passionate about helping others embark on their liveaboard journey—making life on the water simpler, safer, and more enjoyable.
Hazel Peterson says
I am frequently amazed by the amount of useful information I learned at Scouts/Guides. It is one of my sorrows that my kids and grandkids didn’t join.
The Boat Galley says
And my grandkids who did join don’t seem to be learning the outdoor skills.
Chasinmendo says
Wow, heat shrink tubing? Really? I burn my synthetic lines but whipping the ends is so much more seaman-likd and looks so much better!
Carolyn Shearlock says
Yeah, seriously. Heat shrink tubing works well for the new no-stretch lines that won’t melt, particularly for those of us un-seamanlike types . . .
robert l waldrop says
The heat shrink tubing idea is new to me, but while in the Coast Guard (and before that in the Boy Scouts) we used duct tape instead of electrical, but either way works well. Whipping the end of the line is all well and good, but the new synthetics require a little more. We also used to use a regular propane torch to heat up a metal putty knife that had been sharpened for this purpose, and that seared/sealed the cut especially when heated to red hot along the edge. I know they make “heated blades” for this purpose, but your little propane torch is still my preferred method.
Carolyn Shearlock says
We had a hot knife on our previous boat (came with the boat) and while we liked it, we realized that until we start doing a lot of sewing projects, we can get by without it here. Someday, though . . .
Ted Reshetiloff says
I cannot condone the butane backsplice but in a pinch I have been known to employ it.
The Boat Galley says
It’s much better than nothing . . . which seems to be a popular solution!
Okanagan Boating says
There is a better way of doing this!
ChrisW says
Please keep in mind the vapor/smoke from this process is toxic! Do this outdoors and hold your work piece downwind and/or use a fan. Others should not be downwind of you.
SeanF says
I use a Weller Soldering Iron with a paddle tip – works just as well as a hot knife and I didn’t have to purchase another single-purpose tool. I also remove the tape and whip the ends with some hemp twine – old habits are hard to break and it does provide that “finished” look…
BTW – masking tape works equally well for this process if you don’t have any electrical tape handy. The point of the tape is just to keep the bitter end from fraying out when heat is applied.
Vivienne says
…..and burn proof gloves, and eye protection hahahahaha
And don’t go sailing, cos it is dangerous!
Rob says
Try using paper masking tape instead of electrical tape. Use 3-4 wraps. Masking tape won’t stretch in the heat like the electrical tape does, giving you a cleaner, more symmetrical end.
Carolyn Shearlock says
Never thought of that, but yes, the electrical tape does stretch and kind of flare out. I knew someone would have a tip to do it better!
Dana Smith says
My process to make a pointed end is to hold the line in a rag; then heat the end; then squeeze the rag and pull the line out through the rag all the while squeezing the rag. This will make a nice pointed end without much of a risk of a burn.
jasonr575 says
I frequently use a paper towel folded a few times instead of a rag I plan on keeping. the rag will get ruined for anything else.
Diane Ericsson says
It makes me a bit sad when I see boats with all lines finished this way. It’s fine for a while but lines look so much nicer finished with whipping twine. And whipping is a great way to multitask- have a glass of wine in the cockpit while doing a fancy whipping from a marlinspike handbook.
The Boat Galley says
We do this a lot on lines that are just going into the line locker. We don’t know what length we may eventually cut them to, so don’t want to whip. And we sometimes do it when we just need a quick solution — all our sheets are whipped.
Bob Dryer says
Bob Says
Regular electric soldering iron works fine for me and you can use it to mold the melted end to a semi point. Have a spare tip for electrical work.