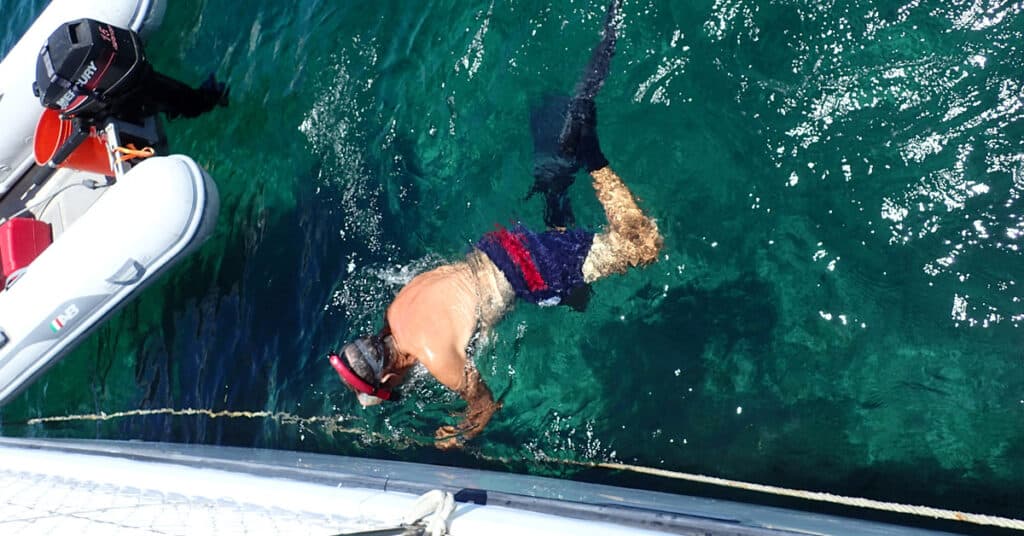
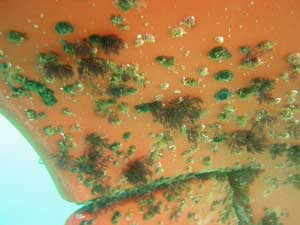
You don’t want the bottom of your boat to look like this. Trust me. It’s slow, the engine overheats, and your depthsounder won’t give accurate readings. But if you’re cruising in out-of-the-way places, there may not be a diver to clean it for you. Or you may prefer to spend your money on other things. For whatever reason, someday you may have to clean the boat bottom yourself.
I wrote this article for Cruising World, which published it as “Scrubbing Up, In the Water” in September 2006. Don’t make the same mistakes we did!
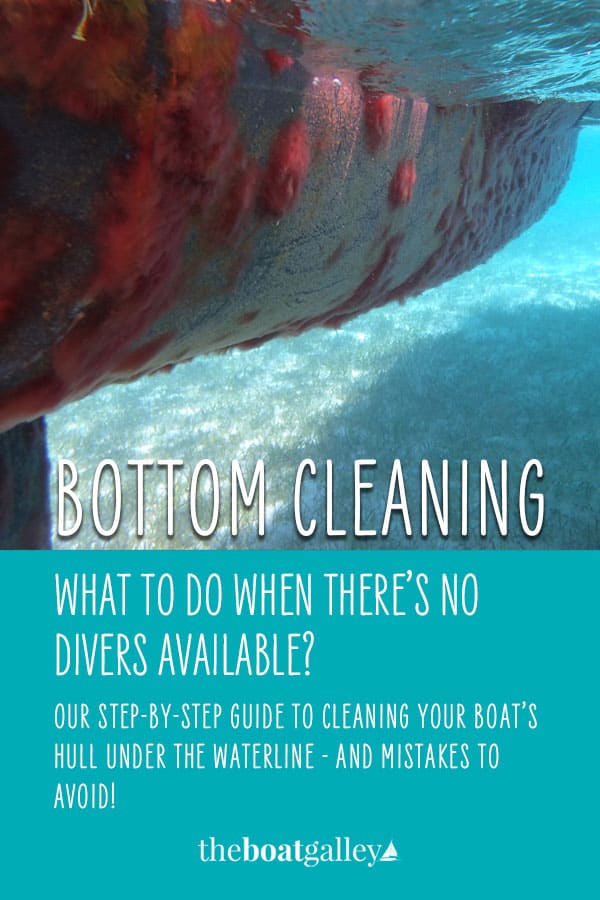
Do-It-Yourself Boat Bottom Cleaning
Our first experience with cleaning the bottom of ¿Qué Tal?, our Tayana 37, was pretty bad. Just a month after leaving the marina and beginning cruising, Dave and I did almost everything wrong, starting with not recognizing the signs of a seriously fouled prop and ending with almost not getting back on board because our swim ladder was too short.
In between, we exhausted ourselves and became shark bait from barnacle cuts. We learned a lot that day . . . the hard way. And we’ve discovered that cleaning the bottom isn’t so horrible, once you know a few things.
Signs the Bottom Needs Cleaning
“Look at the waterline and see if there’s growth!” Unfortunately, this isn’t always reliable. Where we are, oftentimes there isn’t much growth for the first 6 to 12 inches below the water.
This is especially true if you’ve extended the boat’s bottom paint above the waterline to form a boot stripe. Unless the water is exceptionally clear, you won’t see growth on the prop from the dinghy or dock, as the prop will maintain approximately the same outline until the growth is severe. To really check, you have to put on a snorkel mask and look under the hull.
In tropical waters, we’ve found that the bottom needs cleaning at least once a month, more often in the summer or in “nutritionally rich” harbors or areas with agricultural runoff. The exact frequency will depend on your paint and your location.
If the growth is sufficiently bad, you’ll see operating problems:
- depthsounder behaving erratically – often the first symptom, as you can’t use bottom paint on most transducers and thus growth is worst here
- slower speed than expected for the conditions
- engine running hotter than normal
- inability to develop normal RPM, even with full throttle – making you think you have a problem with a clogged fuel filter (this is particularly a symptom of a badly fouled prop)
The Tools
Before just jumping over the side, let’s look at what you’ll need. You don’t need SCUBA gear or a hookah, but free diving takes longer and is much more tiring. After cleaning the bottom twice with just snorkel gear, we bought a hookah and have never regretted it. You definitely need at least a mask so you can see what you are doing and fins sure help – particularly if you’re free diving.
If you are free diving, using a few dive weights – enough to make you less buoyant but not sinking – will make the job easier as you won’t use so much of your energy (and air) just to stay under. You also won’t be as likely to scrape your head and shoulders on the hull and accumulated barnacles.
We have hard antifouling paint and our basic tools include:
- a metal 6” putty knife and a 4” wide piece of plexiglass for scraping large surfaces.
- a 1” putty knife for cleaning the prop and shaft as well as tighter areas– a plastic putty knife is less likely to scrape the bronze propeller, but will wear away with use. We have to replace it every 3 or 4 cleanings.
- a flat screwdriver to get inside thru-hulls.
Some boats also find an old carpet scrap and a small wire brush helpful. Boats with ablative paint generally substitute a soft rag or brush for the large scrapers.
A suction cup handle to keep you in one place is useful when you are cleaning a small, fussy area such as the propeller, but not absolutely necessary. It is less useful when cleaning large areas of the hull and keel.
Tie 3 feet of light line to each of the tools and the handle of the suction cup – you’ll tie the other end of each around your wrist before getting in the water with it. That way, when (not if) you drop it, you’ll be able to easily retrieve the item. While it’s a nuisance to retrieve a tool when you’re anchored in 10 feet of water over white sand with good visibility, it becomes nearly impossible if the water’s murky, deep or the bottom dark and soft.
A big item to plan for: how will you get back aboard? A boarding ladder needs to reach at least one, preferably two, steps below the water for most of us to use it. Alternatively, you may be able to get into your dinghy and then get aboard your boat. This was our single biggest problem in our first bottom cleaning expedition – we put the boarding ladder over, then both jumped in.
The dinghy was on deck, stowed for passage. It was only after we’d worked on the bottom for an hour that we discovered that the bottom step of the ladder was an inch above the water. Feeling stupid, we swam to a nearby boat and asked if we could not only come aboard using their swim platform, but also get a ride to our boat. A new ladder suddenly became our number one must-buy item!
“What Should I Wear, Dear?”
Not as frivolous a question as it sounds. Cover as much of your skin as possible, otherwise every time you brush against an uncleaned area of the hull you’ll be cut by any barnacles there.
And because of those barnacles, you really don’t want to wear your brand-new wet suit and possibly slice it to ribbons. Ablative paint is also likely to get all over whatever you wear. On that same ill-fated first attempt at cleaning our prop, Dave and I wore nothing but our swimsuits. Our legs, arms and shoulders were covered with little cuts from each time we’d hit against the boat.
Worst were our hands. Since we didn’t have a handle, we kept grabbing the barnacle-encrusted prop to keep us in place. Not a good idea without gloves!
If the water is warm, an old Lycra dive skin or a loose pair of pants and a long-sleeve t-shirt will work. Consider this sacrificial clothing that may get cut instead of your skin. If it’s colder, wear your wetsuit, but put the sacrificial clothing over it. We like to wear a Lycra dive hood to keep stuff we’ve scraped off the hull out of our hair. Cheap jersey gloves work well to protect your hands.
A Couple of Safety Items
So now you’re finally ready to “jump in and give her a scrub,” right? Well, almost. Pick a time when there is slack current and little wave or swell action. If there is any current – or it’s likely to increase before the job is done – tie a safety line off the stern to grab onto if you can’t make it back to the ladder. I’ve seen professional divers tie lines from stanchions and then use them to keep themselves in place when working in stronger current. To keep your hands free, tie your end of the line around your waist.
Most of us aren’t used to doing a lot of activity underwater. Don’t overtire yourself or allow yourself to get chilled (even “really hot” 90º water is cooler than your body temperature). Break the job into shorter sessions, spread over several days. This is even more true if you are free diving – set a time limit and stick to it. I know of a couple of boats that free dive to clean the boat bottom, and they work for only 10 to 15 minutes at a time, but do a little almost every day.
How to Clean the Boat Bottom
Al Winn of Spirit, a CT 41 ketch, uses ablative bottom paint and works hard to be gentle on the paint. He begins with a soft brush and rubs it over the hull and keel to remove the soft growth and slime. “While this takes some paint off and I see a little cloud in the water, it’s a lot better than using a scrubby pad like so many professional divers do,” he says. He then uses a 1” plastic putty knife to carefully flick off barnacles individually, not to scrape in large sweeps.
Although the plastic knife wears away and has to be replaced almost every cleaning, Winn says that “a metal putty knife just removes too much paint.”
On ¿Qué Tal?, we have hard modified epoxy bottom paint and aren’t so careful with the bottom paint when cleaning. We start by using the wide scrapers – Dave prefers the piece of plexiglass and I the 6” metal putty knife. We’re not trying to do a perfect job at this point, just get the big areas done. Some cruisers who have more soft growth than barnacles begin with rubbing a carpet scrap over the hull to get the soft growth off, then go back with a putty knife to get the barnacles.
Once an area is free of most of the growth, we go back with a 1” plastic putty knife and get the picky little parts, such as around transducers. If working on one area for a while, it may be helpful to use a suction handle to hold yourself in place.
Regardless of the type of paint, if you start near the waterline and work down, you’ll be less likely to scrape your head or shoulders on barnacles as you ascend.
For some reason, barnacles seem to really like to grow up inside thru-hulls, and have to be scraped out with a screwdriver. This has to be done carefully so that you don’t chip your bottom paint off the thru-hull.
The propeller and rudder take more time and attention. There are plenty of hard to reach surfaces here! We use plastic putty knives on the prop to avoid scratching the bronze and also because the plastic flexes some and conforms better to the shape of the prop blades. Other cruisers, citing the heavier growth on the prop, go ahead and use a metal putty knife. In either case, a 1” width is best. For very tight areas, a small wire brush (about the size of a toothbrush) can work well.
Be sure to thoroughly clean the little openings between the rudder and skeg or keel, and any other areas where one surface moves against another – the “hinge” areas of the rudder assembly and a feathering prop, if you have one. The cleaner you keep these areas, the freer the parts will move. Also, any barnacles caught between two moving surfaces will grind away at them, requiring expensive
repairs.
While you’re working on the prop, grasp the shaft and see if there is any play in it. If there’s more than 1/16” it’s time to think about replacing the cutless bearing. Also, check to make sure that there is no fishing line caught around the shaft. If there is, you’re likely to have to cut it away with a knife. Removing a line may disturb the packing around the shaft. Once back aboard, check the packing gland for drips and tighten it if necessary.
At a distance, a boot stripe of bottom paint is indistinguishable from a more traditional one. Up close, it still looks good — better than growing a moustache!
Finally, check all your zincs. Any that are more than half gone should be replaced. A little cotton ditty bag is useful for carrying the zinc and tools so that nothing gets lost. But just in case, carry spares of whatever bolts and nuts hold your zincs on.
Once back aboard, rinse all your tools and dive gear off with freshwater and spray any metal surfaces with WD-40, Boeshield or a similar protectant.

Carolyn Shearlock has lived aboard full-time for 17 years, splitting her time between a Tayana 37 monohull and a Gemini 105 catamaran. She’s cruised over 14,000 miles, from Pacific Mexico and Central America to Florida and the Bahamas, gaining firsthand experience with the joys and challenges of life on the water.
Through The Boat Galley, Carolyn has helped thousands of people explore, prepare for, and enjoy life afloat. She shares her expertise as an instructor at Cruisers University, in leading boating publications, and through her bestselling book, The Boat Galley Cookbook. She is passionate about helping others embark on their liveaboard journey—making life on the water simpler, safer, and more enjoyable.
Charlotte on Facebook says
Excellent article. Thanks.
Cherielynne on Facebook says
Thanks for sharing!
on Facebook says
Paul — Good idea, you could probably also take a file to the corners.
on Facebook says
Great article! Thanks!
Allan Cobb on Facebook says
I’ve found these to be great from cleaning the prop and shaft. I find them with plastic handles for around $5 and they are good for one or two uses. It is handing having two tools in one. http://www.amazon.com/Hobart-770102-Scraper-Handled-Carbon/dp/B002ACOXUY/?tag=theboagal0a-20
Andrea Dollins on Facebook says
I’m fortunate that my husband loves doing the bottom cleaning, we’ve never used a diver. He also swears by the kind of combo scraper brushes that Allan Cobb recommends in his post, we usually get ours at Harbor Freight.
Michael Matthews on Facebook says
Off topic? I would say that what goes on in the galley has everything to do with bottom cleaning!
Linsay Patterson says
I use a soft(ish) inside broom head attached to a 20mm conduit with a pool noodle (with hole through the centre) slipped over the conduit & a zip tie wrapped about 3 times around the conduit as a stopper so the pool noodle stays down towards the broom head. In storage it’s best to have the conduit permanently bent into a curve – this will get you further under the hull, following the curve of the hull. From the dock, or dinghy, work the broom down & up on the hull. The pool noodle pushes the broom head up towards the hull so the only force is to push it down into the water & allow it to float back up. You also “Balance” the rig to get it all “moving” along the hull. The closer to the water you get, the further under the boat you can get. I’ve done the rudder & keel (30′ er) but it gets much harder to direct it the further down the head gets. At the least, you should get almost to the keel done, the main bulk of it, and then finish off with scuba or hookah!
Mike O'Quin says
18″ but twice the number of hulls.
The Boat Galley says
Yep, but I’ll take twice at 18″ over once at 6′ any day. And two hulls makes it VERY easy to say “enough for today”
Jan Bogart says
We just got one, using with a tank.
Debi Zedaker says
Made one ourselves for 250.00. It’s great.
The Boat Galley says
Debi Zedaker Can you tell me the specifics? Or did you follow plans off the internet? Anything I’ve read on making your own just hasn’t been specific enough to put it together and know I’ll be breathing good air!
Debi Zedaker says
Followed some plans on the Internet. What specifics do you need.
The Boat Galley says
I’d want exact air pump to buy, exact fittings, etc. Do you have a link to the plans you followed?
Kathy Orr says
Enjoyed the article, Carolyn. We have found that a long handled plastic kitchen spatula works well for scraping barnacles. It allows us to go a little deeper free diving that we could otherwise. I’m interested in the hookah rig. Can you explain a bit more about that, and the AirLine? We’ve talked about getting one.
The Boat Galley says
Here’s more info on the Airline. A hookah or tanks makes cleaning the bottom so much easier. Most of our hull is only 18″ under water, but I still spend far more time going up and down when free diving than actually cleaning. Here and in the Bahamas, we don’t have many barnacles but we have a lot of soft moss that’s actually harder to get off. https://www.airlinebyjsink.com/
Bart Trish Masker says
We are looking, too. Gator Gill looks promising. It is 12 volt, use with battery, and can charge the battery with a solar panel!
The Boat Galley says
I wrote them and they don’t recommend using off the boat batteries, they say it should be a dedicated battery.
Bart Trish Masker says
The Boat Galley Thank you. Will be following your choice!?
The Jedi Fisherman says
absolutely correct
The Jedi Fisherman says
Anything about is so important
Christine Dumaine Springfield says
Do you need to borrow our brownie system?
Christine Dumaine Springfield says
You can borrow it but we are definitely not selling it. We use it way too much! Gas powered and a bit loud but has an accumulator and works great.
The Boat Galley says
No, I’m looking to buy one. Thanks for the offer, though! And if you hear of one for sale . . .
Christine Dumaine Springfield says
The Boat Galley I will share!
The Boat Galley says
Many thanks!
sailbadthesinner says
Ablative paint? Swimming through clouds of antifouling seems dangerous to health. Any thoughts?
Carolyn Shearlock says
A couple of things — even hard paint is leeching out its chemicals and you’re exposed to them as you clean the bottom of your boat. Second, wearing a Lycra dive suit helps a lot to keep the crud off you, which is more the growth that you’re scraping than paint. And third, you shouldn’t be scrubbing and scraping hard enough to have “clouds of antifouling” around you. I try very hard NOT to scrape the paint off!
Charlie Jones says
Excellent article. Last time I dove and scraped the bottom of my boat was actually IN Boot Key Harbor, in 1983- 35 foot trimaran- Usually I beached, waited for tide, turn around and did other side next day. In Texas now and not enough tide 🙁