

An inexpensive Chinese diesel heater can keep your boat warm for under $200 and about a gallon of diesel a night, but only if it’s installed for a boat rather than the truck or van it was built for. Lots of cruisers use them, and the difference between a cozy cabin and a carbon monoxide problem comes down to the installation.
Below, a cruiser who has spent many chilly falls heading south shares his experience with one: what he bought, how he installed it, and how he used it. After his install section, I’ve added what you need to do to make one of these heaters safe on a boat.
One Cruiser’s Experience
I’m a Canadian from northern Ontario, so cold weather and I have a long history. That experience has been useful while cruising south in the fall, when Old Man Winter occasionally catches up with me.
Starting with Propane
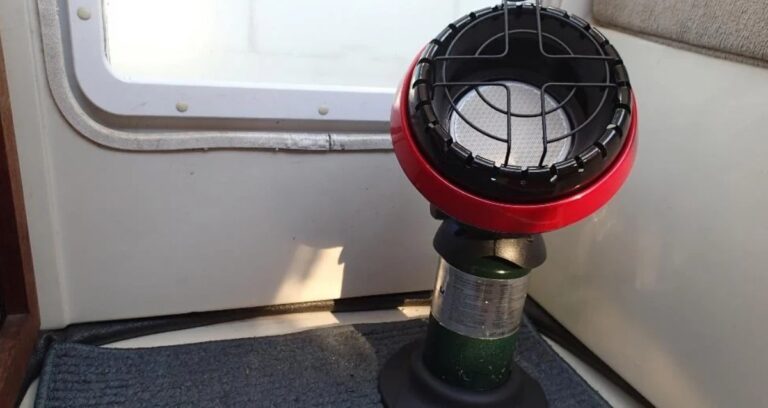
My first heating solution was a Mr. Heater Little Buddy, the same propane heater Carolyn covers in her article. It worked, but needing to store it when not in use got old quickly.
I upgraded to a propane ice hut heater, permanently mounted to a bulkhead. That one connected to a 10 or 20-pound propane bottle and worked well enough. I added a fan above it to move the heat around. Total cost: under $200, including the fan.
But propane heaters come with real drawbacks on a boat:
- Safety: They use an open flame, which consumes oxygen. You need a unit with an oxygen depletion sensor that shuts it down before levels get dangerous. You also need a working CO detector aboard. No exceptions.
- Fuel consumption: Propane burns fast when you’re heating a boat. You’ll run through a 20-pound tank in roughly two to three nights of eight-hour use. That is not practical for extended cruising.
- Condensation: Propane is a wet fuel. In weather under 45°F, you will get significant condensation on your overhead and walls, which means constant wiping down on cold mornings.
Because of the overnight safety concerns, I never ran my propane heater while sleeping. Run it in the evening, shut it off, restart in the morning. It worked, but it wasn’t the answer.
Discovering Diesel Heaters
When my propane unit finally quit, I started researching replacements and found diesel heaters, sometimes called parking heaters or bunk heaters. The well-known brands are Webasto and Espar, both German (Espar is part of the Eberspächer group). Truckers use them for cab heating. They start around $1,000 and go up from there. Defender carries one model at $3,200.

The biggest advantage of diesel heaters is where you mount them. You do not have to put the heater inside your living space. You mount it in an outside locker and run ductwork into the cabin. The combustion happens outside the cabin, and the exhaust goes outside the boat.
Installed properly, with a CO alarm as a backstop, you can run it all night and sleep warm. That is something you simply cannot do with a propane heater.
You can also plumb the heater into your onboard diesel tank rather than rely on the small tank that comes with the unit.
Over $1,000 for a heater I might use a few weeks a year while heading south, though? That stung. Then I found Chinese diesel heaters.
Chinese-Made Diesel Heaters
These units are popular in the van conversion and RV world. They appear functionally identical to the Webasto and Espar units: same components, same design, a fraction of the price. Mine cost $120. Cruisers and van lifers alike widely use units like the Vevor diesel heater (Amazon).

The kit comes with everything you need: the heater unit, a control panel, a small diesel fuel tank, a fuel pump, an exhaust hose, a fuel hose, a short piece of ducting, and miscellaneous hardware.
Installing the Heater
Installation is straightforward and requires nothing more than a screwdriver and a wrench. Most boaters mount the unit in an outside locker and cut a hole through to the interior for the ductwork. Some run the ductwork behind panels for a cleaner look, with just a vent visible inside. Every boat will be different.
Connecting the fuel and wiring is essentially plug-and-play. A few things worth knowing before you start:
- Make sure the exhaust outlet and the combustion air intake are on opposite sides of the boat.
- Use properly sized wiring and fuse for the load. Undersized wiring means you won’t be able to start the heater. I discovered this the hard way. The Boat Galley’s 12 Volt Wiring Size Chart takes the guesswork out of sizing wires correctly.
- The ductwork gets hot. Be careful where you route it.
- The exhaust pipe runs very hot and requires a stainless steel extension to exit safely. You may also need a longer exhaust pipe depending on where you locate the unit.

David and Dan on SV Whitetail put together this short video showing their install. It’s not the Vevor, but very similar and a great real-world look at how it comes together on an actual cruising boat:
Making It Safe on a Boat
From Carolyn: Here’s what I’d add to his experience. These heaters work well, and lots of boaters use them happily. But they’re designed and sold for trucks and vans, and a boat is different in one important way: when it’s closed up on a cold night, any exhaust that leaks has nowhere to go but where you sleep. Carbon monoxide has no smell and no color, so you won’t know it’s there.
Make these changes and checks before you rely on one overnight:
- Put a CO alarm in every sleeping area. It’s your backstop if anything in the exhaust system ever leaks. Test it before each trip and replace it when it reaches the end of its life.
- Replace the exhaust parts that come in the kit. The standard kit exhaust is a truck part, and the silencer often has a drain hole and isn’t sealed. Under a truck, that doesn’t matter. In a cockpit locker, a leak goes into the boat. Use a stainless marine exhaust and a proper exhaust hull fitting, with every joint clamped tight.
- Put the exhaust outlet where fumes can’t get back in. Keep it well above the waterline so it stays clear when you heel, and away from hatches, ports, the companionway, and anywhere people sit.
- Keep the hot exhaust away from anything that can burn. Insulate the exhaust run with exhaust wrap and give it clearance from wood, fiberglass, and wiring.
- Use fuel line and wiring that are up to boat use. Check the fuel line that comes with the kit, and replace it with fuel-rated hose if it looks flimsy. Route it away from the exhaust. Size the wire for the load and the length of the run, and seal every connection; How to Connect Boat Wires So They Don’t Fail walks through doing that right.
- An all-in-one unit still needs its exhaust outside. Self-contained models, with the heater, tank, and controls in one box, are simpler to set up. But they burn diesel the same way, so the exhaust pipe has to run outside the boat. Don’t set one in the cabin with the exhaust trailing out a hatch. Any tiny leak in the exhaust pipe or its connections puts carbon monoxide right where you’re sitting or sleeping.
Mounting the heater in the cockpit is another good option, as the Whitetail video shows. It keeps the heater and its exhaust out of the living space entirely, which is especially handy if you don’t have a suitable locker. One catch: if you zip up a cockpit enclosure in cold weather, as many of us do, make sure the exhaust exits outside the enclosure. Otherwise the fumes collect right at your companionway.
None of this is expensive, and every item can be handled while you’re doing the install anyway.
Decoding the Manual
Back to our guest’s story:
The manual that comes with Chinese diesel heaters is written in what I can only describe as incomprehensible English. It is, by a factor of 1,000, the most challenging document I have ever tried to interpret.
One passage, in a section on temperature control, reads: “…which makes gears clearly shown and is very convenient for the part old hands.” There are no gears. I still have no idea what “part old hands” means.
The controls include an “up regulation” and “down regulation” button. Neither is labeled with an arrow. I got the heater running quickly, then spent considerable time unable to lower the output while sweating in 85-degree heat.
Eventually, I gave up and went to YouTube and several online groups dedicated to these heaters. Between those resources and some trial and error, I pieced together the basic operations. Budget some time for that learning curve.
How I Used It Day to Day
I was never able to figure out the timer function. As it turned out, it didn’t matter, as my unit came with a remote control fob. Lying in bed at 40°F outside, knowing I have a fob under my pillow that will fire up the heater before my feet hit the cabin sole, is a very good feeling.
Because the heater sits in an outside locker with the exhaust vented outside the boat, nothing burns inside the cabin. I ran it at its lowest speed through the night. At that setting, my 2.5-gallon tank lasted over 20 hours, so an 8-hour night used about a gallon of diesel.
Advertised fuel consumption is 0.1 to 0.24 liters per hour, which tracked reasonably well with my experience. When it was chilly at wake-up, I bumped it to high for a few minutes. By the time coffee was ready, the boat was at 72°F.
What to Know Before You Buy
A few more details worth knowing:

- These heaters are quiet. Installed in an outside locker, you won’t hear anything.
- They draw more power during startup than during normal operation, but only for a couple of minutes.
- Replacement parts are widely available, and at under $100 for a complete replacement unit, a failure is not a financial crisis.
You can also get a self-contained unit with the fuel tank attached. It’s similar in concept to a portable propane heater, but it runs on diesel. (See the safety notes above: the exhaust still has to go outside the boat.)
Get the Wiring Right the First Time
Once the exhaust is right, wiring is the other part of the install that trips people up. Undersized wire can keep the heater from starting at all, as our guest found out the hard way. A waterproof wire-size card in the toolbox settles the gauge before you cut a single wire.

From The Boat Galley Store
12 Volt Wiring Size Chart
Avoid the risks of improper wiring, such as equipment damage or fire hazards
- 3% and 10% voltage drop tables, and instructions on which to use
- Detailed tables for both regular and engine-room installations
- Compact size, perfect for toolboxes, lockers, or workbenches
- Waterproof and grease-proof, so it stands up to tough environments
Keep reading

Some links in this article (including all Amazon links) are affiliate links, meaning that we earn from qualifying purchases.