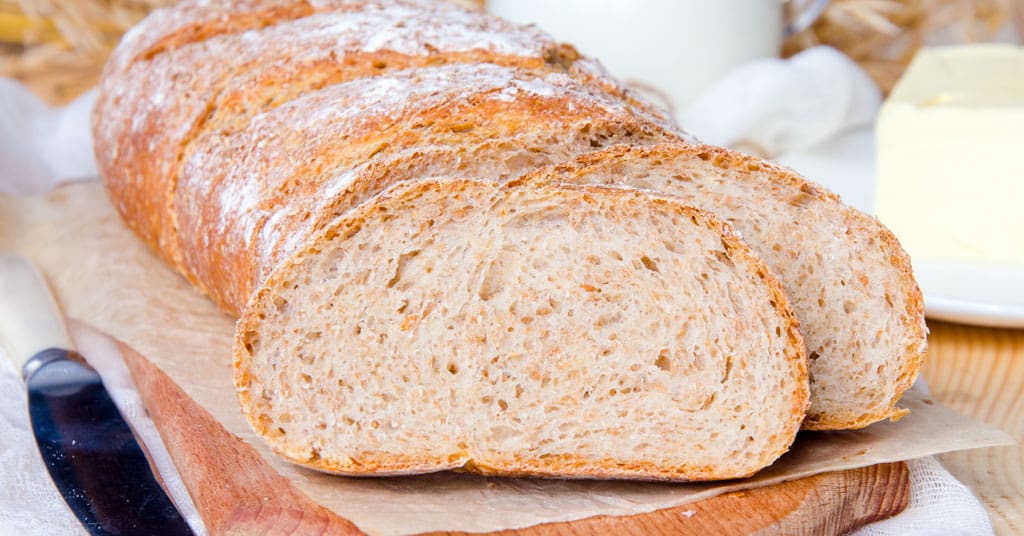
Often, beginner cruisers think baking bread on a boat is too difficult. But I disagree. I love making fresh bread. I understand that if you’ve never done it before — or only with a breadmaker — you might be a little intimidated. But you don’t have to be.
Here are 5 things I’ve learned to ensure success and make it a little easier. Plus I’ve shared some bonus tips from fellow cruisers. If you want really detailed step-by-step instructions, check out Yeast Bread Making 101. By the way, homemade bread is a wonderful thank-you gift. I’ve even traded loaves for fresh lobster and shrimp!
If you’ve never made yeast bread by hand before, start with a simple recipe for white bread. While whole wheat is healthier, white is a little less picky about your technique. Then, once you’ve gotten the hang of things with a few loaves of white, move on to whole wheat and other grains.
And, of course, The Boat Galley Cookbook has recipes for both yeast breads and easy, quick breads that anyone can make.
Tip 1: Don’t Use Freshly Chlorinated Water
Many cruisers use bleach in their water tanks to keep the nasties at bay. It’s generally not a problem as the chlorine dissipates over time. But heavily chlorinated water can inhibit yeast action and keep bread from rising.
A basic rule is that if you can still smell the chlorine in the water, it will interfere with your yeast. Don’t add bleach to your tanks right before making bread unless you have a tap with a charcoal filter (to remove the chlorine) or another source of water.
Tip 2: Use Local Yeast and Take Care of It
My experience is that the more local the yeast, the better it works. My guess is that imported yeast may sit in hot warehouses and not sell quickly in the local stores.
In most places outside the US, this means buying bulk yeast in vacuum-sealed “bricks”. Since most US recipes are written in terms of “packets” of yeast, the conversion is generally:
2-1/4 teaspoons of yeast = 1 package
Bulk yeast should be stored in a tight-lidded plastic container (I like the Lock & Lock containers). Keep it cool — in the refrigerator is best. Heat will kill it!
Even taking care in storing it, you may find that yeast becomes less and less potent over time. So you can’t stock up too far in advance on it. I find that I couldn’t count on it being good much more than 6 months. And that brings up the next tip:
Tip 3: Always Proof the Yeast
In breadmaking, the term “proof” can be used to mean “rise.” But it is also used to describe the process of making sure that the yeast is still potent before adding all the flour and possibly wasting it. Most cookbooks no longer even describe the process, but older ones do . . . and the pioneer women always used the technique.
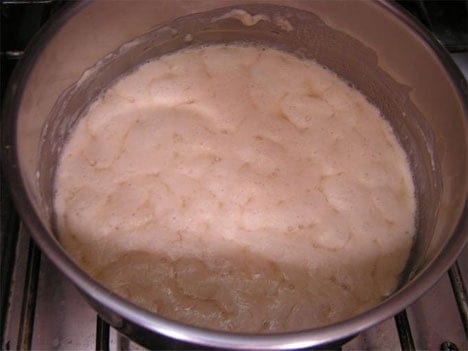
To proof, mix together the required liquid, sugar and yeast. Let sit for 10 minutes in a warm place and then check the mixture. It should be foamy, or bubbly, as in the photo below. If not, or there are only a few bubbles, the yeast is dead, your bread won’t rise and you might as well throw the mixture out and not waste any more ingredients. If the yeast proofs well, continue with the recipe.
Tip 4: Don’t Use Artificial Sweeteners
Yeast feeds on sugar; without it, the dough won’t rise. You can use other natural sugars, such as honey, molasses or corn syrup. But artificial sweeteners just don’t do the trick. I’ve done lots of experiments. You really don’t want to know how many proofing mixes I’ve thrown out. I have yet to find anything labelled “no calorie,” “low calorie” or “sugar free” that works.
The basic rule of thumb is that you need approximately the same amount of sugar as yeast. So if the recipe is for a particularly sweet bread and calls for much more than that, you may be able to substitute some artificial sweetener (Splenda or others) for part of the sugar. But there still must be at least as much sugar as yeast.
Tip 5: Knead the Bread in the Bowl
When we first moved aboard, my biggest problem in making bread was the mess it made when I’d knead it. The flour would get in the crevice of the counter lip, if the boat rolled a bit, I’d end up with flour on the floor. And worst of all (when it was HOT outside) I’d have to turn the galley fan off or there was flour everywhere!
Simple solution: knead the dough in the bowl!
- Wash your hands, then lift the dough up and sprinkle some flour under it.
- Take your hand and fold one side of the dough to the center of the bowl and push down with your knuckles or heel of your hand.
- Turn the bowl a quarter turn.
- Keep working around the bowl until the dough is no longer sticky – you may have to add more flour. You don’t want the dough sticky, but you don’t want to add so much flour that the bread is dry and crumbly. You are generally better off erring on the side of too little flour.
- Typically, the dough should be kneaded for 5 to 7 minutes.
If you really don’t want to knead the dough, no-knead breads are a great alternative. A great introduction to them is Kneadlessly Simple (Amazon), a wonderful book devoted to the topic. Despite what the author says about needing a cool location, I’ve used the technique successfully when it’s been 90+ outside by using slightly less yeast. And I didn’t have a cast iron pot, so it may not have been “perfect” — but it was darn good!
Bonus Tips from The Boat Galley Readers
I love learning from other cruisers. So I’m including some bonus tips for baking break on a boat provided by our readers.
Tara says, “Having an instant read thermometer has been indispensable to me when baking bread. I never knew if the bread was done all the way through, and I’d usually end up with a slightly moist loaf using the “browned and hollow sounding” method. The inside of a loaf should be between 190F and 200F when you take it out of the oven. Using the thermometer I’ve always had beautifully cooked bread. It is also helpful for figuring out if the ambient temperature is just right for each rise. I don’t have a place that gets consistently warm/cool enough, so my bread seems to rise in a different spot each time.
Tenting the loaf for the last 10 minutes with tin foil will help the top from getting too brown. And of course the baking stone is key to not having a burned bottom! “
And Anna suggests making your own yeast. “You don’t need to buy yeast – it is so easy to just make your own sourdough starter, and capture the wild yeasts from the air.
Just mix half a cup of flour (rye is best if possible) with half a cup of water. Stir it and ‘feed’ it (with more flour and water) each day. It will take about 3-14 days to come to life (depending on where you are).”
However you make it, as the scent of freshly-baked bread fills the anchorage, don’t be too surprised when other cruisers — or the local fishermen — “just happen” to stop by your boat!


Carolyn Shearlock has lived aboard full-time for 17 years, splitting her time between a Tayana 37 monohull and a Gemini 105 catamaran. She’s cruised over 14,000 miles, from Pacific Mexico and Central America to Florida and the Bahamas, gaining firsthand experience with the joys and challenges of life on the water.
Through The Boat Galley, Carolyn has helped thousands of people explore, prepare for, and enjoy life afloat. She shares her expertise as an instructor at Cruisers University, in leading boating publications, and through her bestselling book, The Boat Galley Cookbook. She is passionate about helping others embark on their liveaboard journey—making life on the water simpler, safer, and more enjoyable.
Carolyn Shearlock says
My tips were for making “regular” bread . . . maybe I should have said that.
Carolyn Shearlock says
That’d be my guess. Next time, set it to 375 and see what it does.
Peter Forte says
Several years ago, I bought your book, The Boat Galley Cookbook and like it very much. I learned the benefit of using a pressure cooker in the galley. However, I wish there were more recopies to expand the use of the pressure cooker.
Carolyn Shearlock says
Anything that takes some simmering can be done in a pressure cooker. Honestly, I use my pressure mostly on rough days, to have a pan where the lid won’t come off.